Hello Dragonfly!
Hi my Stamper Friends,
as I am sitting in my living-room in Austria, I wonder what everyone is doing right at this moment ...
Some of you might be shoveling snow, some might be gald they made it to work without slipping off the slick roads, others could be just lucky enough to be able to stay home and stamp their hearts out - making Valentines.
I am keeping busy preparing for family visiting me here for a few weeks.
But ... no worries, I am still nurtoring my creative soul and mind, more details will be posted soon.
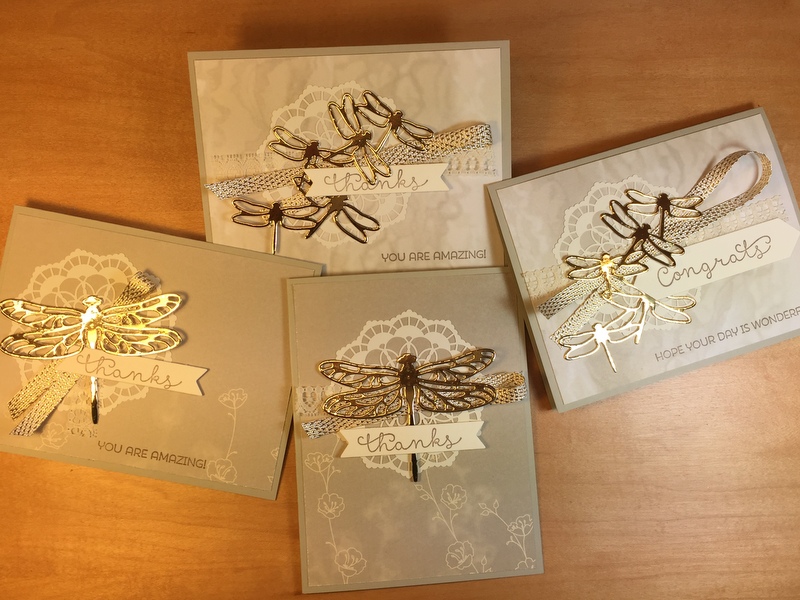
Before taking off for my vacation I sent out Thank You card to all my January customers and Stampingbirds Team members. There were several different variations of the same design, here are some of them.
Product List:
Stamp: Cottage Greetings (page 74 Annual Catalogue)
Paper: Falling in Love Designer Series Paper, Sahara Sand and Very Vanilla card stock, Gold Foil Sheets
Ink: Tip Top Taupe
Tools: Big Shot, Detailed Dagonfly Thinlits Dies, Bunch of Banners Framelits
Embellishments: Very Vanilla 1/2" Lace Trim, 3/8" Metallic Ribbon Combo Pack (SAB 2017) Lace Doilies
as I am sitting in my living-room in Austria, I wonder what everyone is doing right at this moment ...
Some of you might be shoveling snow, some might be gald they made it to work without slipping off the slick roads, others could be just lucky enough to be able to stay home and stamp their hearts out - making Valentines.
I am keeping busy preparing for family visiting me here for a few weeks.
But ... no worries, I am still nurtoring my creative soul and mind, more details will be posted soon.
Before taking off for my vacation I sent out Thank You card to all my January customers and Stampingbirds Team members. There were several different variations of the same design, here are some of them.
Product List:
Stamp: Cottage Greetings (page 74 Annual Catalogue)
Paper: Falling in Love Designer Series Paper, Sahara Sand and Very Vanilla card stock, Gold Foil Sheets
Ink: Tip Top Taupe
Tools: Big Shot, Detailed Dagonfly Thinlits Dies, Bunch of Banners Framelits
Embellishments: Very Vanilla 1/2" Lace Trim, 3/8" Metallic Ribbon Combo Pack (SAB 2017) Lace Doilies
I picked two designs of the lovely DSP, made sure to use the Very Vanilla side of our Lace Doilies.
The Metallic Ribbon Combo Pack is FREE product with a $60 order during SAB 2017, I used the vanilla ribbon woven with shiny golden accents.
Instructions:
1) Fold 8 1/2"x 5 1/2" piece of Sahara Sand CS, scored at 4 1/2"
2) Adhere 5 1/4" x 4" piece of DSP to card front, same size of Very Vanilla CS goes to the inside of the card
3) Glue the Lace Doily to card front, attach ribbons, approx. 11" in length each, and adhere the cut out dragonfly
4) Stamp sentiment on bottom right side of the card using Tip Top Taupe ink
5) Stamp "Thanks" on strip of Very Vanilla CS and cut out banner using Bunch of Banners Framelits, adhere to card front using Dimensionals and/or Glue Dots, and you are DONE! Congratulations!
Thank you so much for your interest in my blog posts, hope you enjoy my movie.
I want to give credit to Cathy Caines of inthecatcave.com, I found her card on Pinterest and CASEd it.
Now time to lean back and watch .
Thank you all,
be happy, create and stamp with
Christine
Skip to the Sale-A-Bration with Paper Pumpkin
Hello my Stamper Friends,
Just want to share this video with you. Looking back at the past Paper Pumpkin year, so much fun to see it all in and I will get back to you shortly.
Let's skip to the fun, be happy, stamp and create,
Christine
Fresh start with new ideas - 1 in 10 Card Video
Hello my Stamping Friends,
I am back, bringing some news to you.
There will be series of videos posted, along with photos, product list and short instructions on "How To .."
For starters I am planning to publish one video every 2 weeks. I am calling it "1 in 10", meaning 1 card in 10 minutes.
As you can see, I am going to show how easy annd quick it is to make a hand-made card.
So let's start:
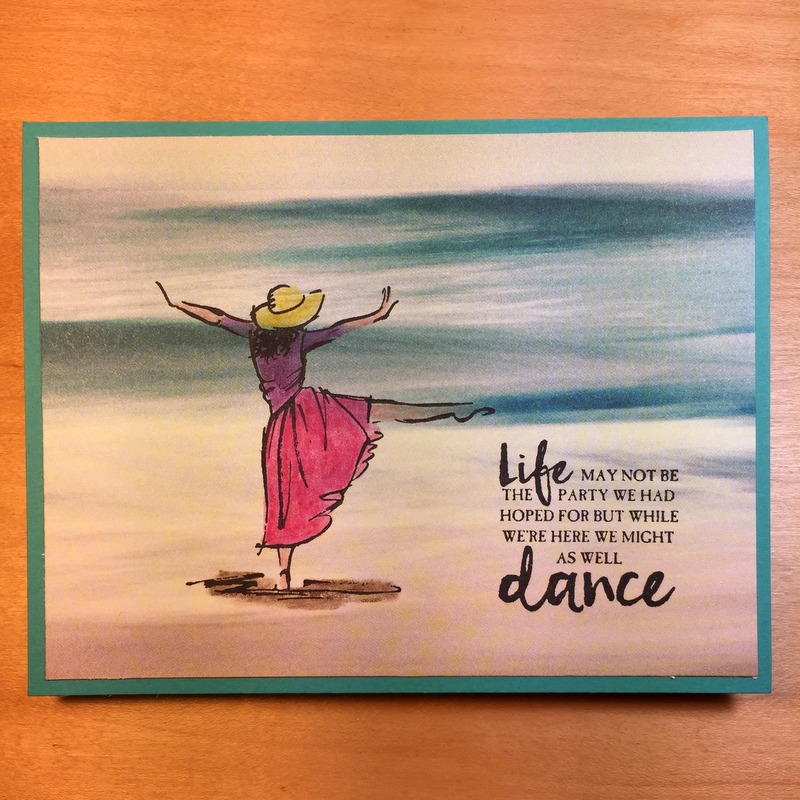
My first "1in10" card is called "Beautiful You", named after the stamp set on page 24 of 2017 Occasions Catalogue.
I am also using paper from "Serene Scenery Designer Series Paper Pack", from 2016-2017 Annual Catalogue (pg 174).
Product List:
Stamp: Beautiful You
Paper: Serene Scenery Designer Series Paper Pack, Bermuda Bay, Melon Mambo and Whisper White cardstock
Ink: Momento Ink - Tuxedo Black
Watercolour Pencils - NEW!!
Tools: Blender Pen
I used our new Watercolor Pencils to colour in the areas I wanted to highlight. The Blender Pen is the perfect tool to create a cohesive look, well blended, a bit of shading, almost like an painter would do, but trust me, I am far from being an artist! With the help in my tools, the right background paper and stamp set, I created a beautiful card showingg a lady dancing on the shore, maybe here in sunny Nova Scotia ....

I am back, bringing some news to you.
There will be series of videos posted, along with photos, product list and short instructions on "How To .."
For starters I am planning to publish one video every 2 weeks. I am calling it "1 in 10", meaning 1 card in 10 minutes.
As you can see, I am going to show how easy annd quick it is to make a hand-made card.
So let's start:
My first "1in10" card is called "Beautiful You", named after the stamp set on page 24 of 2017 Occasions Catalogue.
I am also using paper from "Serene Scenery Designer Series Paper Pack", from 2016-2017 Annual Catalogue (pg 174).
Product List:
Stamp: Beautiful You
Paper: Serene Scenery Designer Series Paper Pack, Bermuda Bay, Melon Mambo and Whisper White cardstock
Ink: Momento Ink - Tuxedo Black
Watercolour Pencils - NEW!!
Tools: Blender Pen
I used our new Watercolor Pencils to colour in the areas I wanted to highlight. The Blender Pen is the perfect tool to create a cohesive look, well blended, a bit of shading, almost like an painter would do, but trust me, I am far from being an artist! With the help in my tools, the right background paper and stamp set, I created a beautiful card showingg a lady dancing on the shore, maybe here in sunny Nova Scotia ....
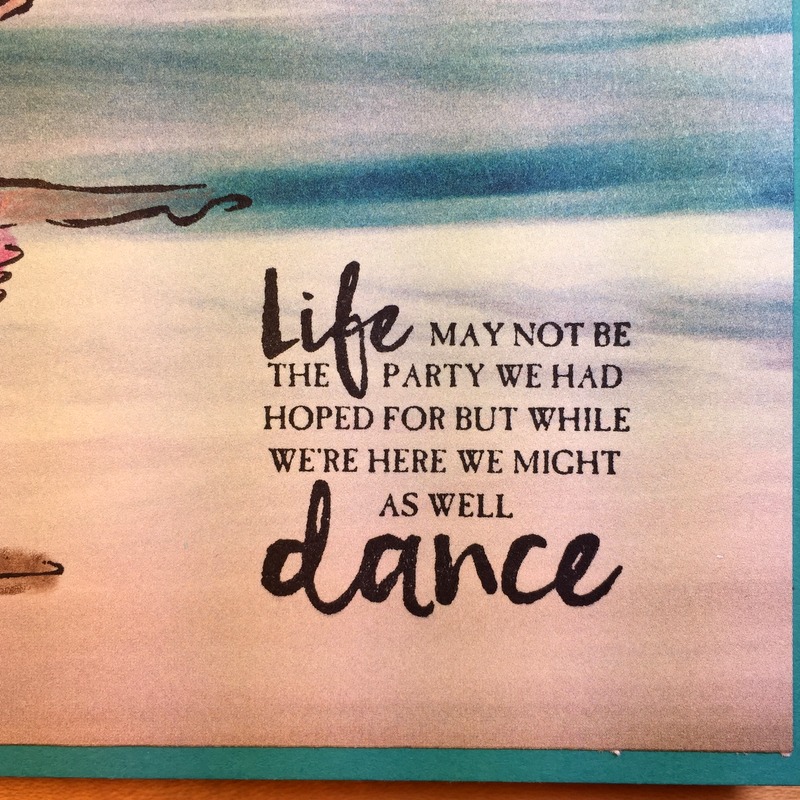
Using Momento Ink ensure a clean, crisp image that will not fade or smear when colouring
or blending.
Instructions:
1) Fold 8 1/2"x 5 1/2" piece of Bermuda Bay CS, scored at 4 1/4"
2) For inside, 2 layers, glue 5"x 3 3/4" Whipser White onto 5 1/8"x 3 7/8" Melon Mambo and attach to inside of card
3) Stamp the image and sentiment on 5 1/4"x 4" piece of DSP
4) Using Watercolour Pencils colour in the image, then blend inks to create the finished look
5) Adhere DSP to card front - give yourself a pat on the shoulder, because you are DONE! Congratulations!
Thank you for your interest in my card. I find inspiration for most of my work on Pinterest, am always looking for ideas and samples to copy, which is ok to do. This is , open 24/7.
Thank you all,
Be happy, create and stamp with
Christine
NEW - Online Card Classes - Make it from your Home
Hi my Stamper Friends,
I am so excited to introduce to you my new product line: Online Card Classes
Each Class will include a STAMP SET!!
January 2017: Many Occasions Class will include Dragonfly Dreams stamp set and the second class features one of my favorite sets...Balloon Adventures. If you order BOTH classes you can choose a FREE Sale-A-Bration item! These classes will be cut and ready for you to assemble....I do the work and you have the fun!
Choose from two classes! Pick one or BOTH...and get a FREE Sale-A-Bration choice!
1. Many Occasions Class includes the new stamp set Dragonfly Dreams on page 26 of the Occasions catalog, all paper to make 6 cards, cut and scored for you to assemble, all embellishments you will need, as well as 6 envelopes. The PDF tutorial will show you how to make these awesome cards! Cost: 45.00
2. Balloon Adventures Birthday Cards Class! Your kit includes Balloon Adventures stamp set on pg 5 of the Occasions Catalogue, supplies to make 6 birthday cards, a gift card holder and one decorated storage case. You will be ready for the next few birthdays, able to send out your oown hand-made cards. My PDF tutorial will show you how to make these projects! Cost: 55.00
If you choose BOTH classes, you'll save $5 AND get to pick one Sale-A-Bration item (excluding 12"x12" paper, the tin and wood mounted stamp sets)
Registration for both classes close on January 19th, your kits will ship by January 30th.
This email address is being protected from spambots. You need JavaScript enabled to view it.
The new catalogue has such an incredible selection of product, I love paying with these awesome new stamp sets an tools, and I cannot wait to share them with you.
Be happy, create & stamp with
Christine
January 2017: Many Occasions Class will include Dragonfly Dreams stamp set and the second class features one of my favorite sets...Balloon Adventures. If you order BOTH classes you can choose a FREE Sale-A-Bration item! These classes will be cut and ready for you to assemble....I do the work and you have the fun!
If you choose BOTH classes, you'll save $5 AND get to pick one Sale-A-Bration item (excluding 12"x12" paper, the tin and wood mounted stamp sets)
This email address is being protected from spambots. You need JavaScript enabled to view it.
Be happy, create & stamp with
Christine
TAKE ME BACK TO THE TOP
Current Host Code
PKTURGTS
CLICK TO SHOP WITH HC
See here how to use a Host CodeCLICK TO SHOP WITH HC

Free Newsletter!

Paper Pumpkin
SIGN ME UP!

Share With Friends
Most Recent Blog Posts
- FREE SHIPPING - DEC 14
- FREE SHIPPING from Oct 9th to 11th
- Stamp another Stack of Christmas Cards with Kevin & Christine
- Let the fun begin - again …
- Why wait? Join us now!
- Fitting Florets for any Occasion
- Festive Window Wishes
- Starter Kit + = No brainer!
- Perched in a Tree
- Awash in Beauty, so gorgeous!

.jpg)
.jpg)
.jpg)
.jpg)
.jpg)
.jpg)
.jpg)
.jpg)
.jpg)
.jpg)
.jpg)
.jpg)
.jpg)
.jpg)
.jpg)
.jpg)
.jpg)
.jpg)
.jpg)
.jpg)
.jpg)
.jpg)
.jpg)
.jpg)
.jpg)
.jpg)
.jpg)
.jpg)
.jpg)
.jpg)
.jpg)
.jpg)
.jpg)
.jpg)
.jpg)
.jpg)
.jpg)
.jpg)
.jpg)
.jpg)
.jpg)
.jpg)
.jpg)
.jpg)
.jpg)
.jpg)
.jpg)
.jpg)
.jpg)
.jpg)
.jpg)
.jpg)
.jpg)
.jpg)
.jpg)
.jpg)
.jpg)
.jpg)
.jpg)
.jpg)
.jpg)
.jpg)
.jpg)
.jpg)
.jpg)
.jpg)
.jpg)
.jpg)
.jpg)
.jpg)
.jpg)
.jpg)
.jpg)
.jpg)
.jpg)
.jpg)
.jpg)
.jpg)
.jpg)
.jpg)
.jpg)
.jpg)
.jpg)
.jpg)
.jpg)
.jpg)
.jpg)
.jpg)
.jpg)
.jpg)
.jpg)
.jpg)
.jpg)
.jpg)
.jpg)
.jpg)
.jpg)
.jpg)
.jpg)
.jpg)
.jpg)
.jpg)
.jpg)
.jpg)
.jpg)
.jpg)
.jpg)
.jpg)
.jpg)
.jpg)
.jpg)
.jpg)
.jpg)
.jpg)
.jpg)
.jpg)
.jpg)
.jpg)
.jpg)
.jpg)
.jpg)
.jpg)
.jpg)
.jpg)
.jpg)
.jpg)
.jpg)
.jpg)
.jpg)
.jpg)
.jpg)
.jpg)
.jpg)
.jpg)
.jpg)
.jpg)
.jpg)
.jpg)
.jpg)
.jpg)
.jpg)
.jpg)
.jpg)
.jpg)
.jpg)
.jpg)
.jpg)
.jpg)
.jpg)
.jpg)
.jpg)
.jpg)
.jpg)
.jpg)
.jpg)
.jpg)
.jpg)
.jpg)
.jpg)
.jpg)
.jpg)
.jpg)
.jpg)
.jpg)
.jpg)
.jpg)
.jpg)
.jpg)
.jpg)
.jpg)
.jpg)
.jpg)
.jpg)
.jpg)
.jpg)
.jpg)
.jpg)
.jpg)
.jpg)
.jpg)
.jpg)
.jpg)
.jpg)
.jpg)
.jpg)
.jpg)
.jpg)
.jpg)
.jpg)
.jpg)
.jpg)
.jpg)
.jpg)
.jpg)
.jpg)
.jpg)
.jpg)
.jpg)
.jpg)
.jpg)
.jpg)
.jpg)
.jpg)
.jpg)
.jpg)
.jpg)
.jpg)