Knit Together Card - Instructions are FREE!
Knit Together Card
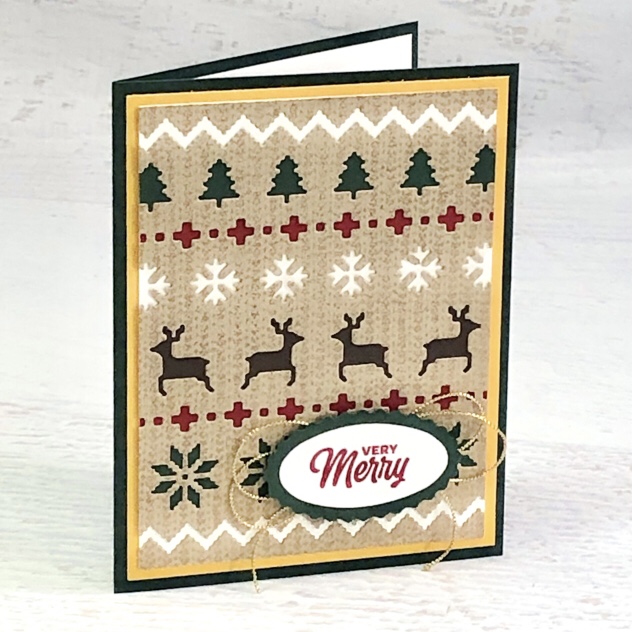
The Knit Together bundle makes me think of cozy fall and winter projects like cards and treat packages. Thinking beyond the obvious, I also think it would be a perfect knit blanket texture for a baby card. Can you imagine it in sweet pink, blue, yellow, or a soft green?
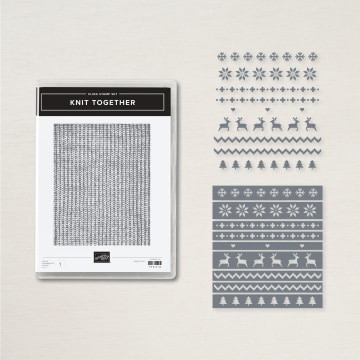
Because the Knit Sweater Dies are separate mix and match strips they can be used individually or together in lots of combinations. This card spans the Autumn and winter seasons with rich colours and traditional patterns.
1) Stamp Background
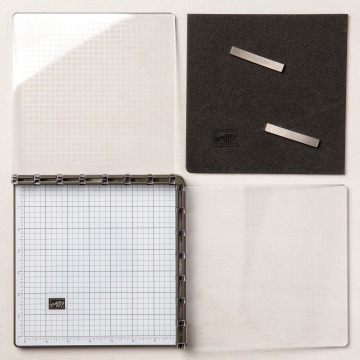
Ink the Knit Together stamp with Crumb Cake ink. Stamp off once to lighten the ink. Stamp again onto 3-3/4" x 5" Crumb Cake cardstock. The Stamparatus is ideal for background stamps. It is easier to hold and easier to stamp again if you miss a spot.

2) Grid Paper & Tape
You will want to decide on a pattern for your die cut strips. I like to line them up evenly on grid paper and then use Blue Painter's Tape to hold them together. This way you can line them up once and cut over and over again.

3) Die Cut
Line up the dies on the stamped cardstock and die cut. If you are using lots of the strips, like shown, you may need to add a shim to help cut through all the way. Remove the zig zag strips.

4) Cardstock Strips
Cut two 3-3/4" x 3/8" Cherry Cobbler strips and one 3-3/4" x 1" Early Espresso strip. Cut Evening Evergreen cardstock to 3-3/4" x 7/8" and 3-3/4" x 5/8". Cut Basic White cardstock to 3-3/4" x 5".

5) Adhere Strips
Flip the die cut Crumb Cake layer face down. Use small dots of Multipurpose liquid glue placed on the Crumb Cake layer, to adhere the cardstock strips behind the die cut areas as shown. Place the Evening Evergreen 3-3/4" x 7/8" behind the stars and 3-3/4" x 5/8" behind the trees

6) Zigzagz & Base
Match up the zigzag with the correct top or bottom edge of the die cut layer. Adhere the top zigzag to the top edge of the 3-3/4" x 5" Basic White cardstock with Multipurpose Liquid Glue. Repeat for the bottom edge. Adhere the main die cut section centred between

7) Assemble Card
Cut Evening Evergreen cardstock to 5-1/2" x 8-1/2". Score at 4-1/4" along 8-1/2" side. Fold card. Adhere 4" x 5-1/4" Basic White layer inside. Adhere 4" x 5-1/4" Crushed Curry layer centred on the front. Adhere die cut layer centred on card front.

8) Stamp & Punch
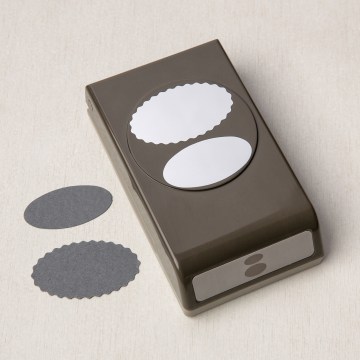
Stamp greeting with Cherry Cobbler ink on Basic White cardstock. (Greeting show is from Sweet Little Stockings stamp set #156282). Punch greeting with smaller oval from the Double Oval Punch. Punch scrap Evening Evergreen with the larger scalloped oval. Layer together

9) Gold Trim
Add a strip of Stampin' SEAL across the second star from the right. Loop 18" of Gold Simply Elegant Trim and press it loosely to the Stampin' SEAL so it looks somewhat like a double bow.

10) Add Greeting
Use Stampin' Dimensionals to add punched greeting over the trim to help hold it in place.
SUPPLIES
TAKE ME BACK TO THE TOP
Current Host Code
CLICK TO SHOP WITH HC

Free Newsletter!

Paper Pumpkin
SIGN ME UP!

Share With Friends
Most Recent Blog Posts
- FREE SHIPPING - DEC 14
- FREE SHIPPING from Oct 9th to 11th
- Stamp another Stack of Christmas Cards with Kevin & Christine
- Let the fun begin - again …
- Why wait? Join us now!
- Fitting Florets for any Occasion
- Festive Window Wishes
- Starter Kit + = No brainer!
- Perched in a Tree
- Awash in Beauty, so gorgeous!

.jpg)
.jpg)
.jpg)
.jpg)
.jpg)
.jpg)
.jpg)
.jpg)
.jpg)
.jpg)
.jpg)
.jpg)
.jpg)
.jpg)
.jpg)
.jpg)
.jpg)
.jpg)
.jpg)
.jpg)
.jpg)
.jpg)
.jpg)
.jpg)
.jpg)
.jpg)
.jpg)
.jpg)
.jpg)
.jpg)
.jpg)
.jpg)
.jpg)
.jpg)
.jpg)
.jpg)
.jpg)
.jpg)
.jpg)
.jpg)
.jpg)
.jpg)
.jpg)
.jpg)
.jpg)
.jpg)
.jpg)
.jpg)
.jpg)
.jpg)
.jpg)
.jpg)
.jpg)
.jpg)
.jpg)
.jpg)
.jpg)
.jpg)
.jpg)
.jpg)
.jpg)
.jpg)
.jpg)
.jpg)
.jpg)
.jpg)
.jpg)
.jpg)
.jpg)
.jpg)
.jpg)
.jpg)
.jpg)
.jpg)
.jpg)
.jpg)
.jpg)
.jpg)
.jpg)
.jpg)
.jpg)
.jpg)
.jpg)
.jpg)
.jpg)
.jpg)
.jpg)
.jpg)
.jpg)
.jpg)
.jpg)
.jpg)
.jpg)
.jpg)
.jpg)
.jpg)
.jpg)
.jpg)
.jpg)
.jpg)
.jpg)
.jpg)
.jpg)
.jpg)
.jpg)
.jpg)
.jpg)
.jpg)
.jpg)
.jpg)
.jpg)
.jpg)
.jpg)
.jpg)
.jpg)
.jpg)
.jpg)
.jpg)
.jpg)
.jpg)
.jpg)
.jpg)
.jpg)
.jpg)
.jpg)
.jpg)
.jpg)
.jpg)
.jpg)
.jpg)
.jpg)
.jpg)
.jpg)
.jpg)
.jpg)
.jpg)
.jpg)
.jpg)
.jpg)
.jpg)
.jpg)
.jpg)
.jpg)
.jpg)
.jpg)
.jpg)
.jpg)
.jpg)
.jpg)
.jpg)
.jpg)
.jpg)
.jpg)
.jpg)
.jpg)
.jpg)
.jpg)
.jpg)
.jpg)
.jpg)
.jpg)
.jpg)
.jpg)
.jpg)
.jpg)
.jpg)
.jpg)
.jpg)
.jpg)
.jpg)
.jpg)
.jpg)
.jpg)
.jpg)
.jpg)
.jpg)
.jpg)
.jpg)
.jpg)
.jpg)
.jpg)
.jpg)
.jpg)
.jpg)
.jpg)
.jpg)
.jpg)
.jpg)
.jpg)
.jpg)
.jpg)
.jpg)
.jpg)
.jpg)
.jpg)
.jpg)
.jpg)
.jpg)
.jpg)
.jpg)
.jpg)
.jpg)
.jpg)
.jpg)
.jpg)
.jpg)
.jpg)