Frosted Gingerbread & Peppermint Card - Free Instructions
Frosted Gingerbread & Peppermint Card
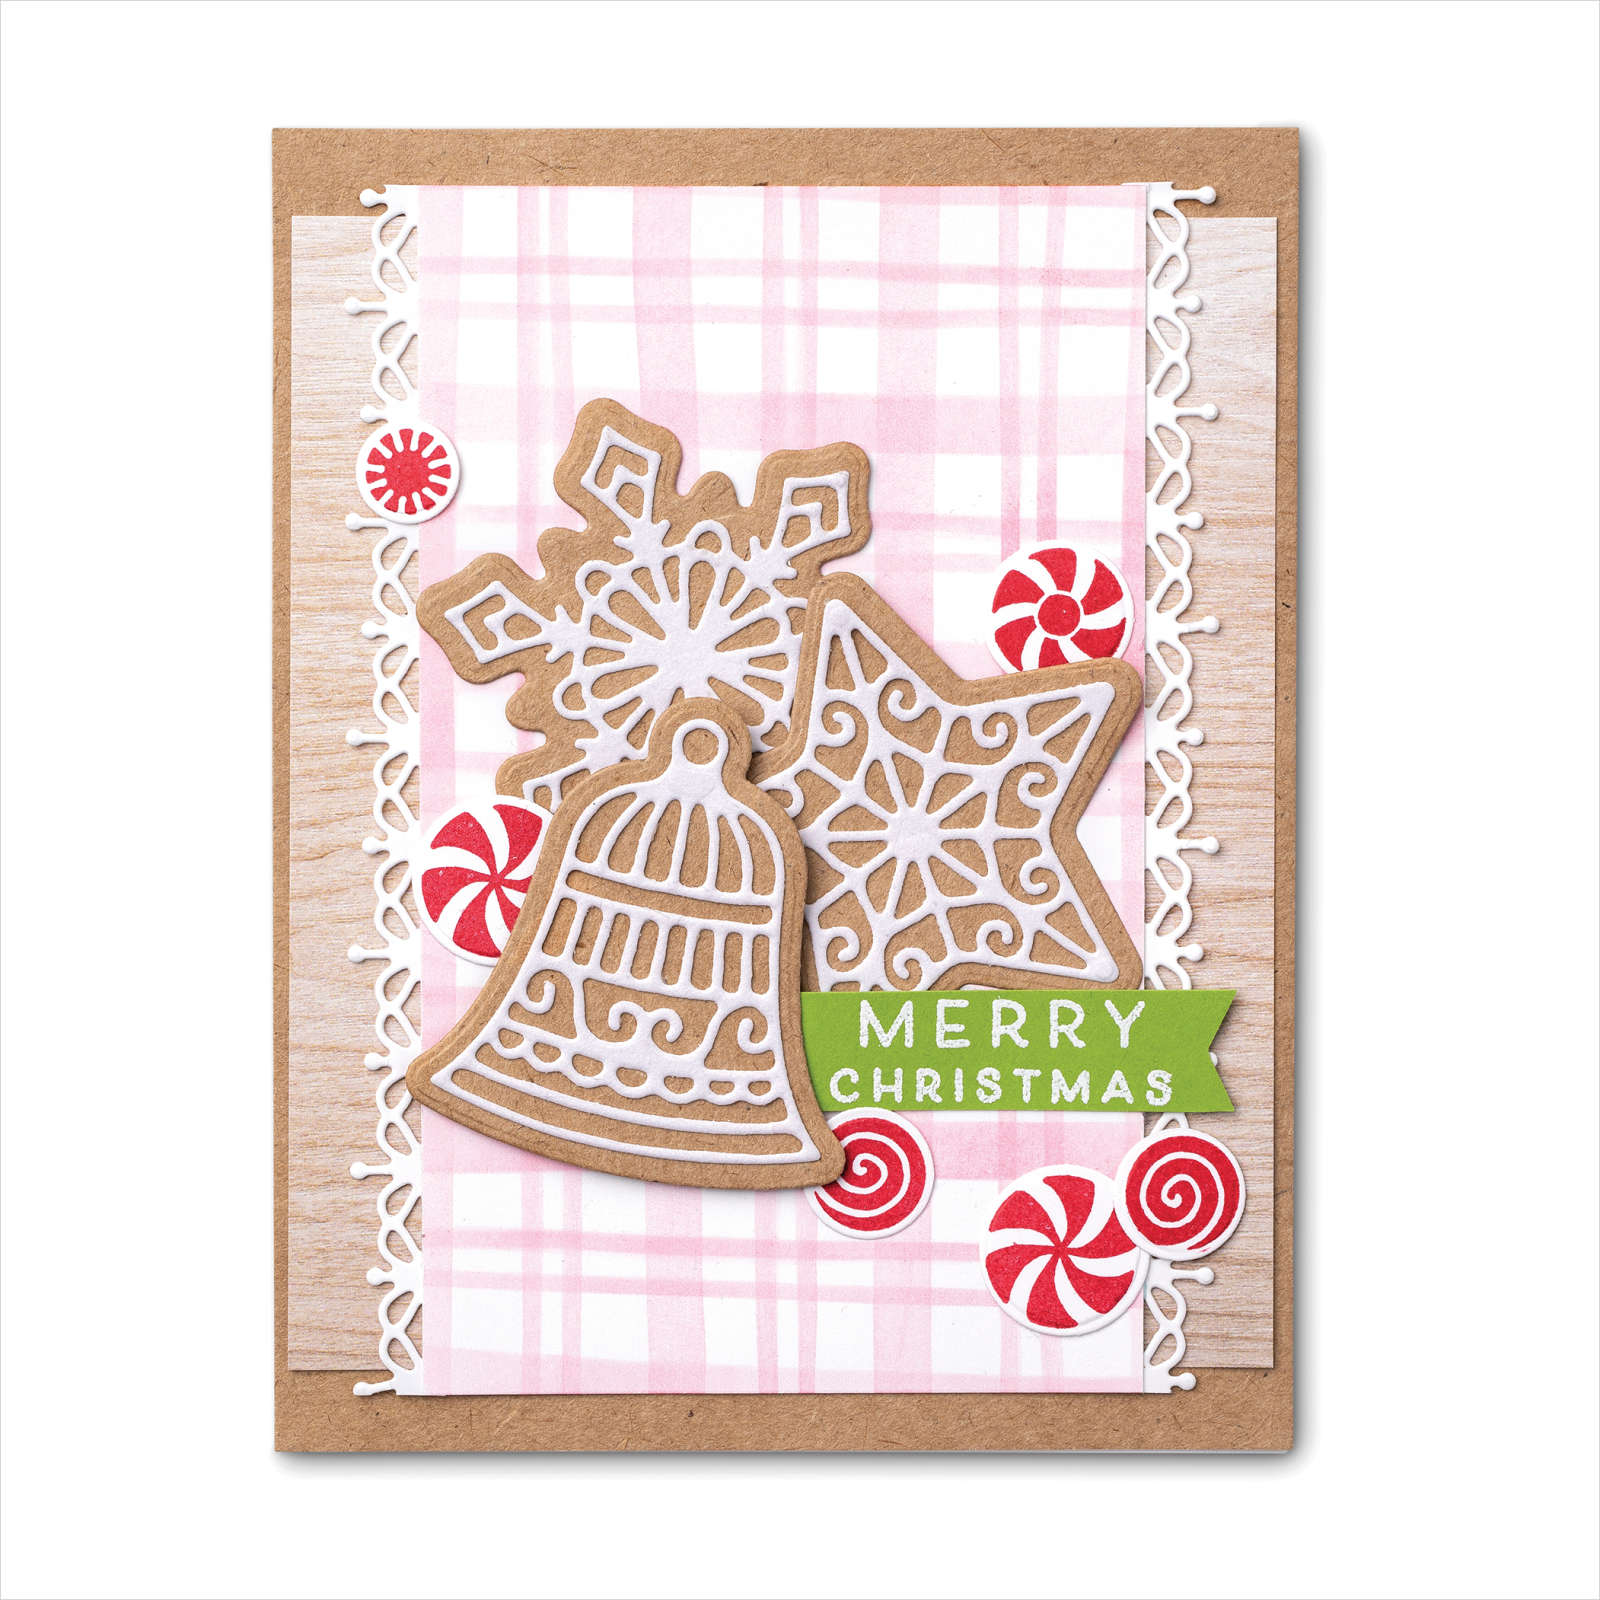
One of the things I always love about the holidays are the sweet smells that fill the house. Whether it's baking gingerbread or stirring a cup of hot chocolate with a peppermint candy cane, the smells of the holidays bring treasured memories to mind.
The tutorial below includes a masking technique to make your own patterned paper, heat embossing, and lots of intricate die cut details.
INSTRUCTIONS:
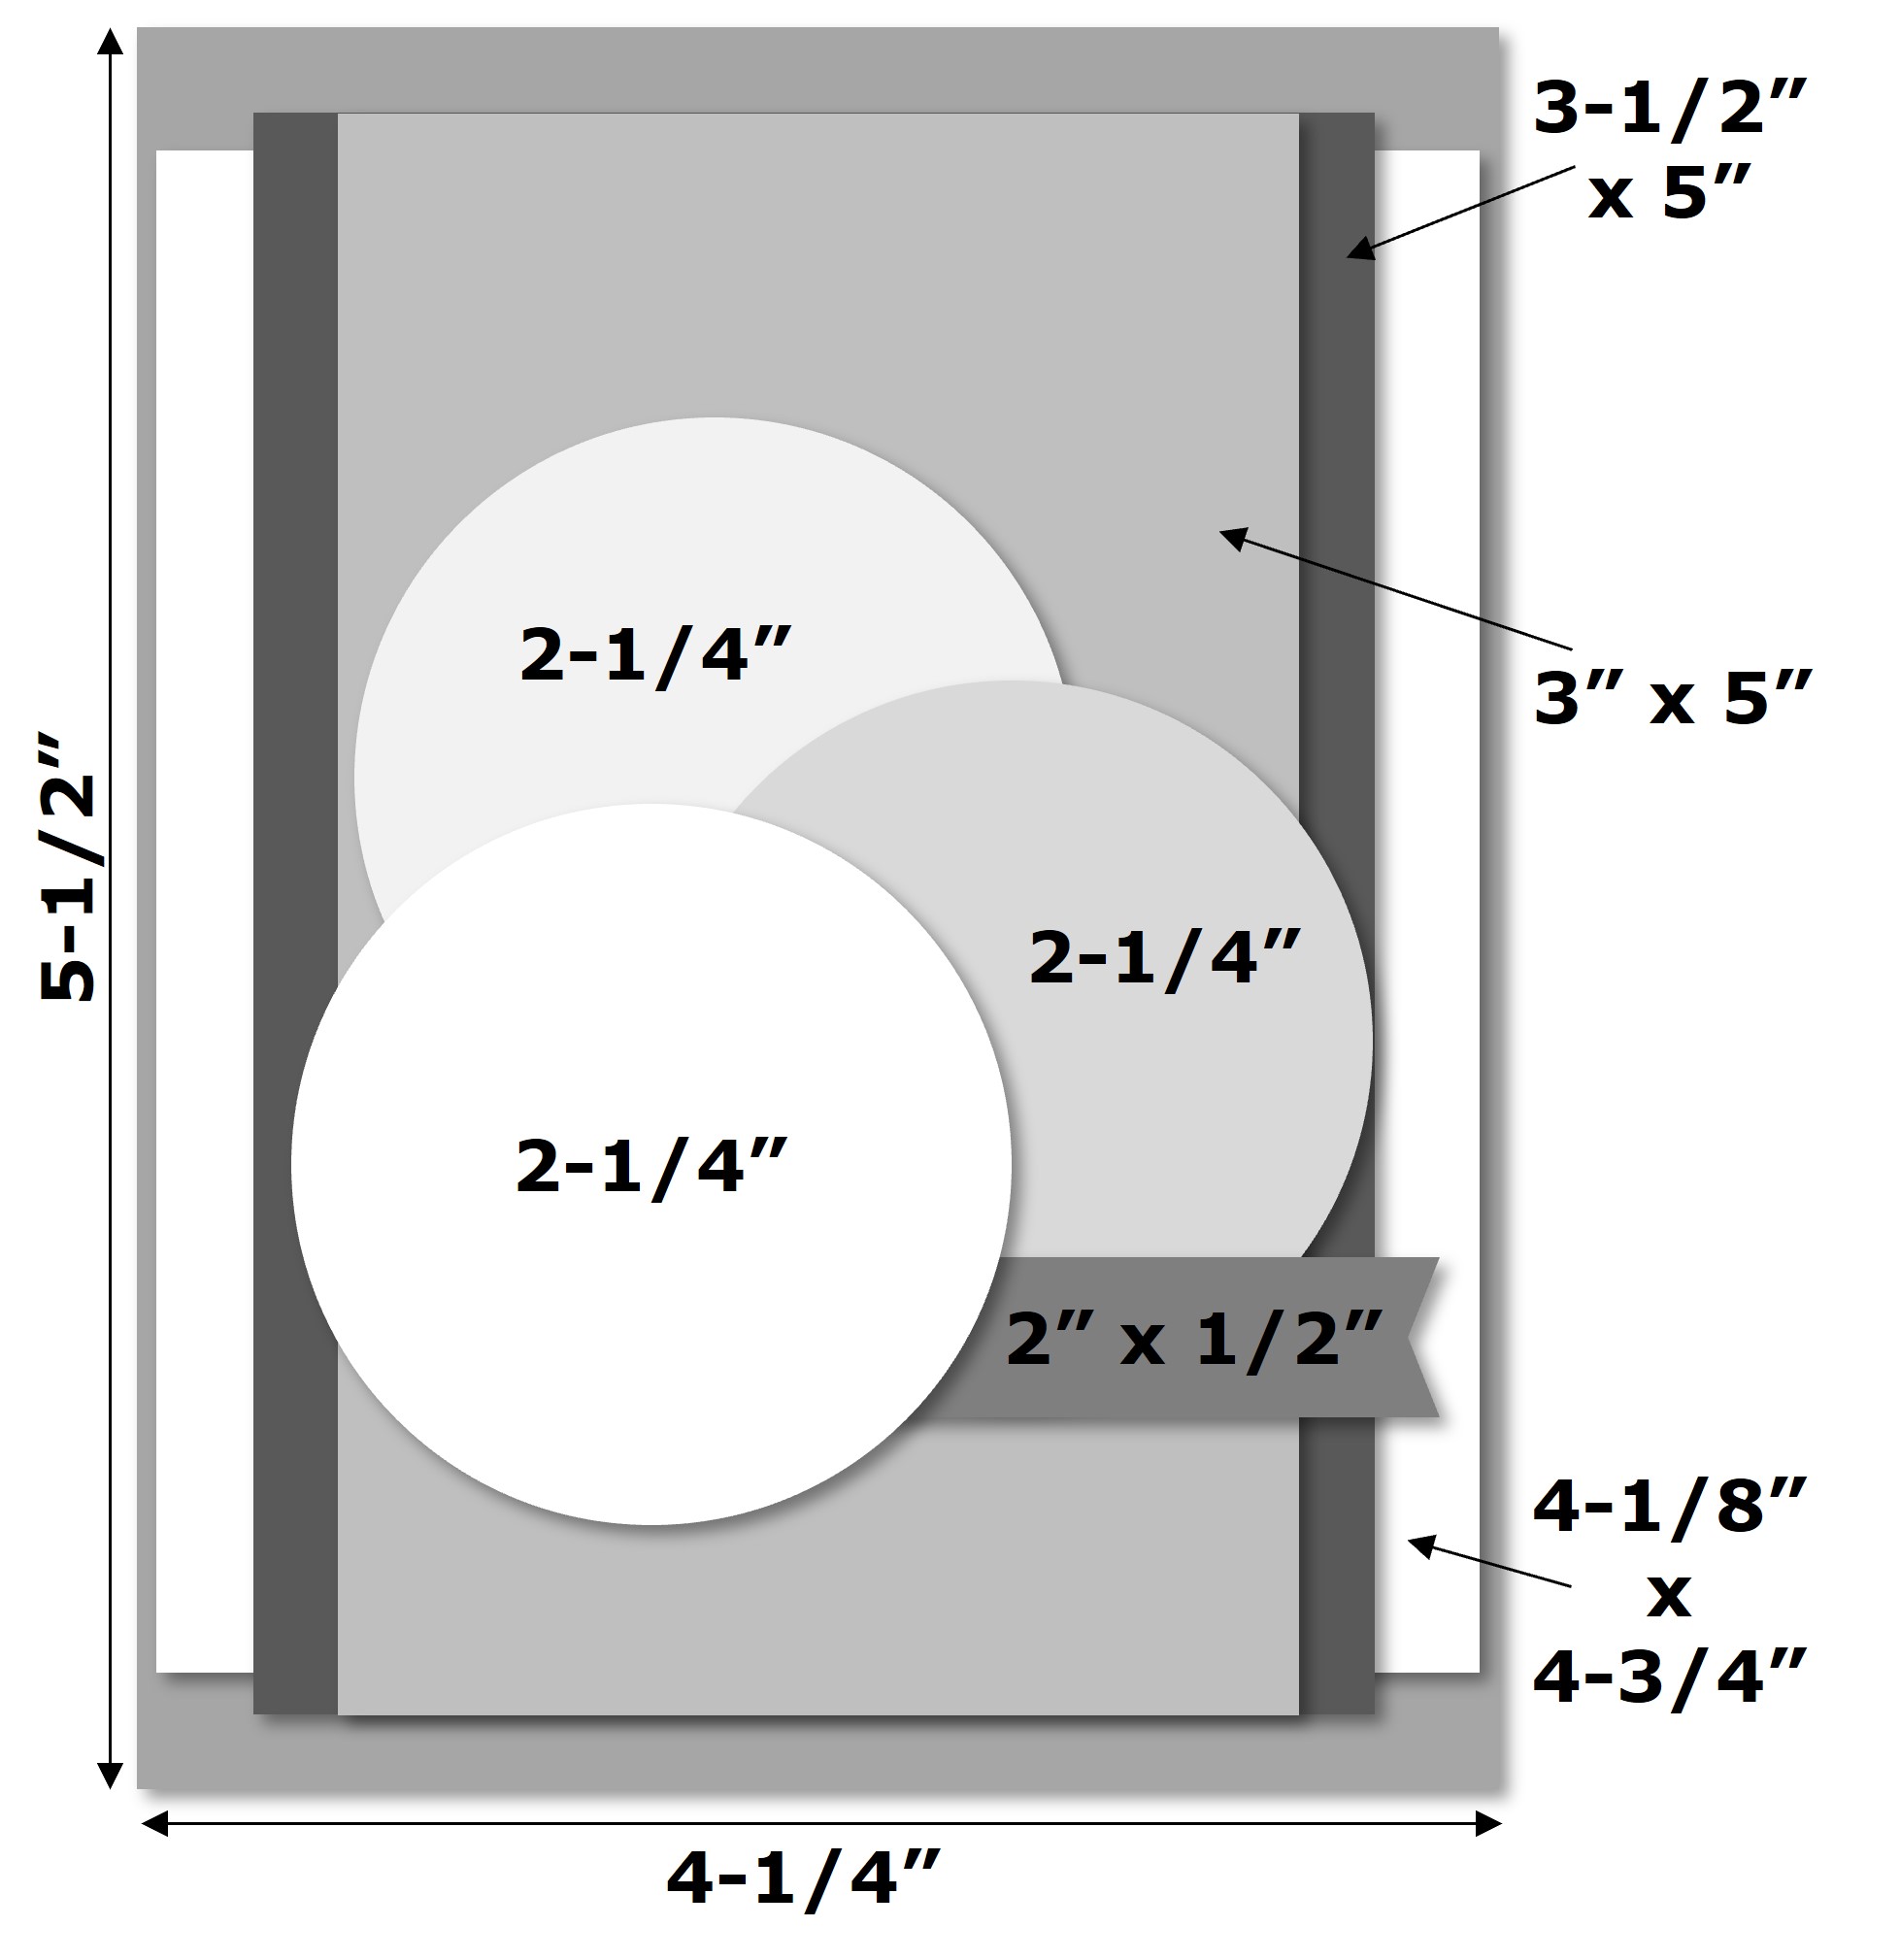
1) Cut Thick Basic White cardstock to 5-1/2" x 8-1/2". Score at 4-1/4" along the 8-1/2" side. Fold card. Cover front of card with 4-1/4" x 5-1/2" piece of Kraft paper.
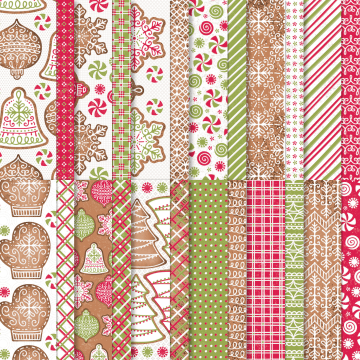
2) Cut wood patterned In Good Taste Designer Series Paper to 4-1/8" x 4-3/4". Adhere to card front.
3) Cut Snowy White Velvet Sheets to 3" x 5". Ink Blending Brush with Real Red ink. Rub most of the real red ink out of your brush on scrap paper until it's a light pink. Place striped pattern of Adorning Designs Decorative Masks over Snowy White Paper so the lines are vertical. Use the Blending Brush to blend ink through the mask. Rotate the mask 90 degrees and repeat to create the plaid design. Set aside to dry.
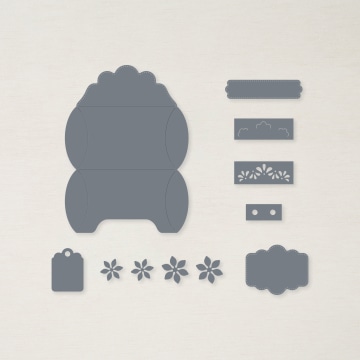
4) Die cut two lacy border strips from Thick Basic White cardstock with the Gingerbread dies. Add Stampin' SEAL+ behind each long edge of the plaid Snowy White Velvet Paper. Adhere a die cut strip behind each edge. Trim off excess with Paper Snips. Adhere to cared front.
5) Die cut snowflake, star, and bell shapes from Kraft paper. Die cut coordinating lacy "icing" designs from Snowy White Velvet Sheets. Adhere to Kraft shapes with Multipurpose Liquid Glue. Layer grouped on card front using Stampin' SEAL for the snowflake and star and Stampin' Dimensionals for the bell.
6) Cut Granny Apple Green cardstock to 2" x 1/2". Stamp greeting with VersaMark ink. Cover generously with white Stampin' Emboss Powder. Tap off excess powder. Heat emboss with the Heat Tool. Use Paper Snips to banner cut one end. Adhere to card front with left edge tucked under the bell.
7) Stamp six candy circles in 3 sizes on Thick Basic White cardstock using Real Red ink. Die cut with coordinating dies. Adhere to card front with Stampin' SEAL and Stampin' Dimensionals.
SUPPLIES
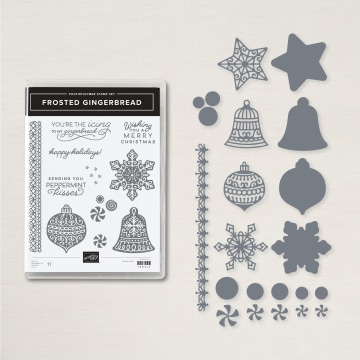
BUNDLES: #156807 Frosted Gingerbread Bundle, (#156314 Frosted Gingerbread stamp set, #156320 Gingerbread Dies)
PAPER: #146990 Granny Apple Green,#159229 Thick Basic White,#152494 In Good Taste Designer Series Paper, #156325 Kraft 6" X 6" (15.2 X 15.2 Cm) Paper Pack, #156405 Snowy White 12" X 12" (30.5 X 30.5 Cm) Velvet Sheets
INK: #102283 VersaMark, #147084 Real Red
TOOLS: #103579 Paper Snips Scissors, #153611 Blending Brushes, #129053 Heat Tool, #156328 Adorning Designs Decorative Masks
BUNDLES: #156807 Frosted Gingerbread Bundle, (#156314 Frosted Gingerbread stamp set, #156320 Gingerbread Dies)
PAPER: #146990 Granny Apple Green, #159229 Thick Basic White, #152494 In Good Taste Designer Series Paper, #156325 Kraft 6" X 6" (15.2 X 15.2 Cm) Paper Pack, #156405 Snowy White 12" X 12" (30.5 X 30.5 Cm) Velvet Sheets
INK: #102283 VersaMark, #147084 Real Red
TOOLS: #103579 Paper Snips Scissors, #153611 Blending Brushes, #129053 Heat Tool, #156328 Adorning Designs Decorative Masks
ADHESIVES: #104430 Stampin’ Dimensionals, #149699 Stampin' Seal+, #152813 Stampin' SEAL, #110755 Multipurpose Liquid Glue
EMBELLISHMENTS: #155554 Basics Embossing Powders (white)
TIPS: When using the Adorning Designs Decorative Masks, or other masks, protect your work surface with a Silicone Sheet or Grid Paper. Using blue painter's tape or similar tape, helps keep the mask from moving. Clean masks with a soft Simply Shammy, soft damp cloth, or under running water.
Coordinating Products


TAKE ME BACK TO THE TOP
Current Host Code
CLICK TO SHOP WITH HC

Free Newsletter!

Paper Pumpkin
SIGN ME UP!

Share With Friends
Most Recent Blog Posts
- FREE SHIPPING - DEC 14
- FREE SHIPPING from Oct 9th to 11th
- Stamp another Stack of Christmas Cards with Kevin & Christine
- Let the fun begin - again …
- Why wait? Join us now!
- Fitting Florets for any Occasion
- Festive Window Wishes
- Starter Kit + = No brainer!
- Perched in a Tree
- Awash in Beauty, so gorgeous!

.jpg)
.jpg)
.jpg)
.jpg)
.jpg)
.jpg)
.jpg)
.jpg)
.jpg)
.jpg)
.jpg)
.jpg)
.jpg)
.jpg)
.jpg)
.jpg)
.jpg)
.jpg)
.jpg)
.jpg)
.jpg)
.jpg)
.jpg)
.jpg)
.jpg)
.jpg)
.jpg)
.jpg)
.jpg)
.jpg)
.jpg)
.jpg)
.jpg)
.jpg)
.jpg)
.jpg)
.jpg)
.jpg)
.jpg)
.jpg)
.jpg)
.jpg)
.jpg)
.jpg)
.jpg)
.jpg)
.jpg)
.jpg)
.jpg)
.jpg)
.jpg)
.jpg)
.jpg)
.jpg)
.jpg)
.jpg)
.jpg)
.jpg)
.jpg)
.jpg)
.jpg)
.jpg)
.jpg)
.jpg)
.jpg)
.jpg)
.jpg)
.jpg)
.jpg)
.jpg)
.jpg)
.jpg)
.jpg)
.jpg)
.jpg)
.jpg)
.jpg)
.jpg)
.jpg)
.jpg)
.jpg)
.jpg)
.jpg)
.jpg)
.jpg)
.jpg)
.jpg)
.jpg)
.jpg)
.jpg)
.jpg)
.jpg)
.jpg)
.jpg)
.jpg)
.jpg)
.jpg)
.jpg)
.jpg)
.jpg)
.jpg)
.jpg)
.jpg)
.jpg)
.jpg)
.jpg)
.jpg)
.jpg)
.jpg)
.jpg)
.jpg)
.jpg)
.jpg)
.jpg)
.jpg)
.jpg)
.jpg)
.jpg)
.jpg)
.jpg)
.jpg)
.jpg)
.jpg)
.jpg)
.jpg)
.jpg)
.jpg)
.jpg)
.jpg)
.jpg)
.jpg)
.jpg)
.jpg)
.jpg)
.jpg)
.jpg)
.jpg)
.jpg)
.jpg)
.jpg)
.jpg)
.jpg)
.jpg)
.jpg)
.jpg)
.jpg)
.jpg)
.jpg)
.jpg)
.jpg)
.jpg)
.jpg)
.jpg)
.jpg)
.jpg)
.jpg)
.jpg)
.jpg)
.jpg)
.jpg)
.jpg)
.jpg)
.jpg)
.jpg)
.jpg)
.jpg)
.jpg)
.jpg)
.jpg)
.jpg)
.jpg)
.jpg)
.jpg)
.jpg)
.jpg)
.jpg)
.jpg)
.jpg)
.jpg)
.jpg)
.jpg)
.jpg)
.jpg)
.jpg)
.jpg)
.jpg)
.jpg)
.jpg)
.jpg)
.jpg)
.jpg)
.jpg)
.jpg)
.jpg)
.jpg)
.jpg)
.jpg)
.jpg)
.jpg)
.jpg)
.jpg)
.jpg)
.jpg)
.jpg)
.jpg)
.jpg)
.jpg)