Harvest Meadow Cork & Gold Card - FREE Tutorial
Harvest Meadow Cork & Gold Card
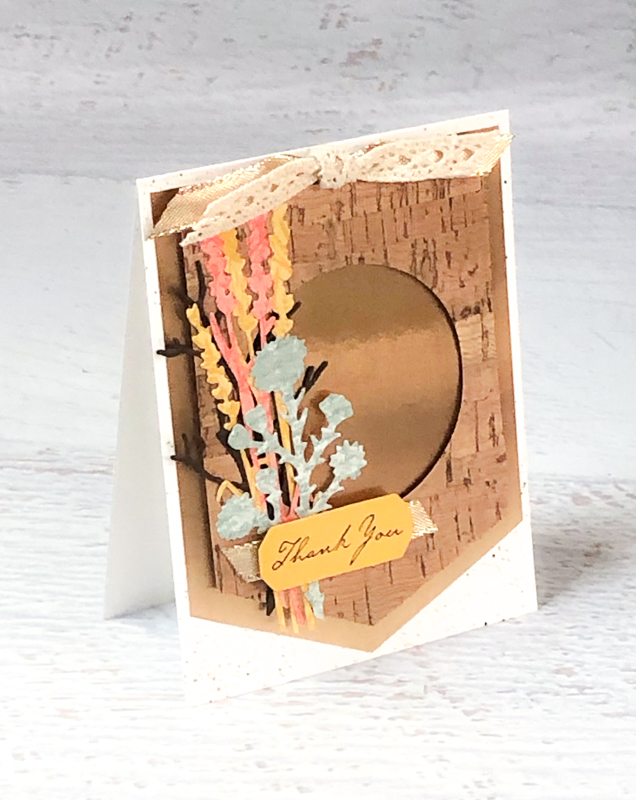
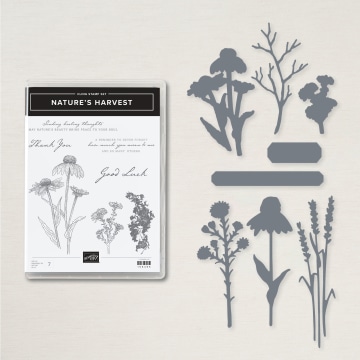
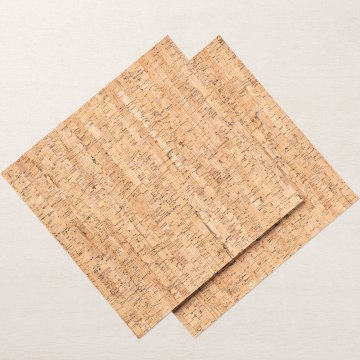
This tutorial features the Harvest Meadow Suite (#156280). I love how the super-thin Cork 12" x 12" Specialty Paper adds the real texture and feel of cork without adding bulk. This is one you have to see in person to truly appreciate. Just a little bit of this paper can really give a project that something that makes it extra-special. The Nature's Harvest Bundle is of you will reach for year round for great floral images and stunning coordinating silhouettes. Grab your stamps and let's get crafting!

1) Cut & Measure Metallic Cardstock
Cut gold Brushed Metallic 12" x 12" Cardstock (#153524) to 4" x 5-1/4". Flip gold side face down measure with a ruler or Paper Trimmer. Mark the back side with a pencil at 2" on the 4" edge and up 1" from the bottom edge on each 5-1/4" sideUse Tailor Made Tags dies to die cut scrap Basic White cardstock with the largest and smallest dies, Polished Pink cardstock with second largest die, and Soft Succulent cardstock with second smallest die. Stamp the tags as shown.

2) Cut & Measure Cork Paper
Score 5″ x 7-1/2" Pansy Petals paper at 3-3/4" along the 7-1/2" side. Add adhesive along the bottom edge of the righthand scored section. Also, add the adhesive up the right side from the bottom stopping at about 2-1/2 to 2-3/4" from the bottom edge. Fold the paper closed creating a pocket that is open at the top and part way down the right side.

3) Cut Gold Banner
Line up the center and one edge mark on the cutting groove of the Paper Trimmer. Hold in place while carefully closing the cutting guide. Hold firmly, and cut the first angle cut for the banner.

4) Finish Gold Banner Cut
Line up the center and the other edge mark on the cutting groove of the Paper Trimmer. Hold in place while carefully closing the cutting guide. Hold firmly, and cut the banner.

5) Cut Cork Banner
Repeat the same steps to line up the center and edge marks and cut the cork banner.

6) Smooth Cut Edge
Cutting the Gold Metallic Cardstock face down can cause the cut edge to bend up a bit. Use the edge of a Bone Folder (#102300) to smooth the edge flat.

7) Die Cut Flowers
Use the Harvest Dies (#156504) to die cut a flower and two grass images from the Harvest Meadow 12" x 12" Designer Series Paper (#156494). Snip one grass piece off one die cut. Cut one branch from Early Espresso cardstock (#119686)

8) Marker Splatter Technique
Cut Thick Basic White cardstock to 4-1/4" x 11". Score at 5-1/2" along 11" side. Use Early Espresso and Bumblebee Stampin' Write Markers to splatter ink on card front. Protect your surface and clothes from ink splatter. Hold Marker about 3"-4" above the paper. Put the Brush Tip into the cap about half way and push the tip away from you. Repeat for desired amount of splatter.

9) Die Cut Layer
Use the second largest Layering Circles Die (#151770) to die cut a circle from the Cork Paper. Save the circle for another project. Layer Cork Paper onto Gold cardstock with Stampin' Dimensionals. Adhere centered on card front with Stampin' SEAL.

10) Add & Trim Flowers
Use dots of Multipurpose Liquid Glue to adhere die cut branch and flowers to Cork Paper. Just dot the glue on to avoid smears. Hold each layer in place a few seconds to help it adhere. Trim die cut ends a various lengths, but shorter than the gold banner.

11) Stamp & Die Cut Greeting
Stamp greeting from Nature's Harvest stamp set (#156495) on scrap Bumblebee cardstock with Early Espresso ink. Die cut with small label die from the Harvest Dies. Layer over 3" piece of Gold 3/8" Shimmer Ribbon (#156470) and adhere to card with Stampin' Dimensionals.

12) Double-Ribbon Knot
Layer 8" piece of 3/8" Diamond Weave Ribbon (#156507) over an 8" piece of Gold 3/8" Shimmer Ribbon. Knot the ribbons together. Trim excess off ends, making the Diamond Weave Ribbon a bit shorter. Adhere to top of card with Glue Dots.
SUPPLIES

TAKE ME BACK TO THE TOP
Current Host Code
CLICK TO SHOP WITH HC

Free Newsletter!

Paper Pumpkin
SIGN ME UP!

Share With Friends
Most Recent Blog Posts
- FREE SHIPPING - DEC 14
- FREE SHIPPING from Oct 9th to 11th
- Stamp another Stack of Christmas Cards with Kevin & Christine
- Let the fun begin - again …
- Why wait? Join us now!
- Fitting Florets for any Occasion
- Festive Window Wishes
- Starter Kit + = No brainer!
- Perched in a Tree
- Awash in Beauty, so gorgeous!

.jpg)
.jpg)
.jpg)
.jpg)
.jpg)
.jpg)
.jpg)
.jpg)
.jpg)
.jpg)
.jpg)
.jpg)
.jpg)
.jpg)
.jpg)
.jpg)
.jpg)
.jpg)
.jpg)
.jpg)
.jpg)
.jpg)
.jpg)
.jpg)
.jpg)
.jpg)
.jpg)
.jpg)
.jpg)
.jpg)
.jpg)
.jpg)
.jpg)
.jpg)
.jpg)
.jpg)
.jpg)
.jpg)
.jpg)
.jpg)
.jpg)
.jpg)
.jpg)
.jpg)
.jpg)
.jpg)
.jpg)
.jpg)
.jpg)
.jpg)
.jpg)
.jpg)
.jpg)
.jpg)
.jpg)
.jpg)
.jpg)
.jpg)
.jpg)
.jpg)
.jpg)
.jpg)
.jpg)
.jpg)
.jpg)
.jpg)
.jpg)
.jpg)
.jpg)
.jpg)
.jpg)
.jpg)
.jpg)
.jpg)
.jpg)
.jpg)
.jpg)
.jpg)
.jpg)
.jpg)
.jpg)
.jpg)
.jpg)
.jpg)
.jpg)
.jpg)
.jpg)
.jpg)
.jpg)
.jpg)
.jpg)
.jpg)
.jpg)
.jpg)
.jpg)
.jpg)
.jpg)
.jpg)
.jpg)
.jpg)
.jpg)
.jpg)
.jpg)
.jpg)
.jpg)
.jpg)
.jpg)
.jpg)
.jpg)
.jpg)
.jpg)
.jpg)
.jpg)
.jpg)
.jpg)
.jpg)
.jpg)
.jpg)
.jpg)
.jpg)
.jpg)
.jpg)
.jpg)
.jpg)
.jpg)
.jpg)
.jpg)
.jpg)
.jpg)
.jpg)
.jpg)
.jpg)
.jpg)
.jpg)
.jpg)
.jpg)
.jpg)
.jpg)
.jpg)
.jpg)
.jpg)
.jpg)
.jpg)
.jpg)
.jpg)
.jpg)
.jpg)
.jpg)
.jpg)
.jpg)
.jpg)
.jpg)
.jpg)
.jpg)
.jpg)
.jpg)
.jpg)
.jpg)
.jpg)
.jpg)
.jpg)
.jpg)
.jpg)
.jpg)
.jpg)
.jpg)
.jpg)
.jpg)
.jpg)
.jpg)
.jpg)
.jpg)
.jpg)
.jpg)
.jpg)
.jpg)
.jpg)
.jpg)
.jpg)
.jpg)
.jpg)
.jpg)
.jpg)
.jpg)
.jpg)
.jpg)
.jpg)
.jpg)
.jpg)
.jpg)
.jpg)
.jpg)
.jpg)
.jpg)
.jpg)
.jpg)
.jpg)
.jpg)
.jpg)
.jpg)
.jpg)
.jpg)
.jpg)
.jpg)
.jpg)
.jpg)
.jpg)