Flowers of Friendship Folded-Corner Pocket Card
Flowers of Friendship Folded-Corner Pocket Card

I am sharing a beautiful fun-fold card with you for this month's tutorial. The Flowers of Friendship bundle and Tailor Made Tags dies really bloom with this design.
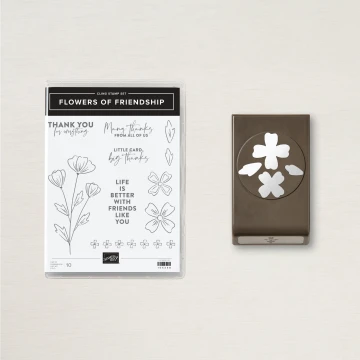
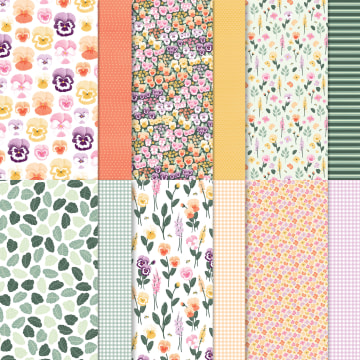
Flowers aren't just for summer, they add brightness and cheer year-round. Stamped and punched flowers from the Flowers of Friendship Bundle (#155590) are the perfect way to express the beauty and gratitude of friendship. The Pansy Petals Designer Series Paper (#155807) and a fun, corner-fold pocket card are the perfect combination. You'll love creating this fun fold with all kinds of different products and themes. I cannot wait to see what you create with this fun fold!

1) Die Cut & Stamp
Use Tailor Made Tags dies to die cut scrap Basic White cardstock with the largest and smallest dies, Polished Pink cardstock with second largest die, and Soft Succulent cardstock with second smallest die. Stamp the tags as shown.

2) Create Pocket
Score 5″ x 7-1/2" Pansy Petals paper at 3-3/4" along the 7-1/2" side. Add adhesive along the bottom edge of the righthand scored section. Also, add the adhesive up the right side from the bottom stopping at about 2-1/2 to 2-3/4" from the bottom edge. Fold the paper closed creating a pocket that is open at the top and part way down the right side.

3) Fold Corner
Add about 4 Stampin' Dimensionals to the to the top right corner of the folded Designer Series Paper. Fold top right corner down and adhere with the Stampin' Dimensionals. You can crease the fold or just bend it to leave more dimension on the card. Adhere folded pocket layer to 4" x 5-1/4″ Evening Evergreen cardstock, then adhere to 4-1/4" x 5-1/2" Soft Succulent cardstock.

4) Add Flowers & Jewels
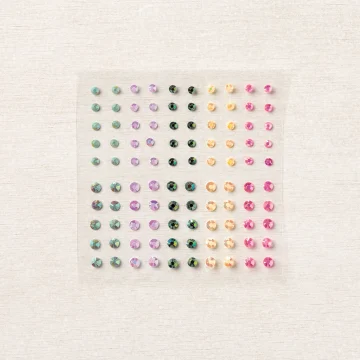
Stamp two large and two small flowers on Polished Pink scrap cardstock with Polished Pink ink. Punch out and layer using Stampin' Dimensionals. Adhere two smallest tags to card front with Stampin' Dimensionals. Slip the two largest tags into the pocket of the card. Add flower with Glue Dots. Add In Color Jewel to center of flower.

5) Write Personal Note
The tag is a perfect spot to write your personal note to the recipient.SUPPLIES
TAKE ME BACK TO THE TOP
Current Host Code
CLICK TO SHOP WITH HC

Free Newsletter!

Paper Pumpkin
SIGN ME UP!

Share With Friends
Most Recent Blog Posts
- FREE SHIPPING - DEC 14
- FREE SHIPPING from Oct 9th to 11th
- Stamp another Stack of Christmas Cards with Kevin & Christine
- Let the fun begin - again …
- Why wait? Join us now!
- Fitting Florets for any Occasion
- Festive Window Wishes
- Starter Kit + = No brainer!
- Perched in a Tree
- Awash in Beauty, so gorgeous!

.jpg)
.jpg)
.jpg)
.jpg)
.jpg)
.jpg)
.jpg)
.jpg)
.jpg)
.jpg)
.jpg)
.jpg)
.jpg)
.jpg)
.jpg)
.jpg)
.jpg)
.jpg)
.jpg)
.jpg)
.jpg)
.jpg)
.jpg)
.jpg)
.jpg)
.jpg)
.jpg)
.jpg)
.jpg)
.jpg)
.jpg)
.jpg)
.jpg)
.jpg)
.jpg)
.jpg)
.jpg)
.jpg)
.jpg)
.jpg)
.jpg)
.jpg)
.jpg)
.jpg)
.jpg)
.jpg)
.jpg)
.jpg)
.jpg)
.jpg)
.jpg)
.jpg)
.jpg)
.jpg)
.jpg)
.jpg)
.jpg)
.jpg)
.jpg)
.jpg)
.jpg)
.jpg)
.jpg)
.jpg)
.jpg)
.jpg)
.jpg)
.jpg)
.jpg)
.jpg)
.jpg)
.jpg)
.jpg)
.jpg)
.jpg)
.jpg)
.jpg)
.jpg)
.jpg)
.jpg)
.jpg)
.jpg)
.jpg)
.jpg)
.jpg)
.jpg)
.jpg)
.jpg)
.jpg)
.jpg)
.jpg)
.jpg)
.jpg)
.jpg)
.jpg)
.jpg)
.jpg)
.jpg)
.jpg)
.jpg)
.jpg)
.jpg)
.jpg)
.jpg)
.jpg)
.jpg)
.jpg)
.jpg)
.jpg)
.jpg)
.jpg)
.jpg)
.jpg)
.jpg)
.jpg)
.jpg)
.jpg)
.jpg)
.jpg)
.jpg)
.jpg)
.jpg)
.jpg)
.jpg)
.jpg)
.jpg)
.jpg)
.jpg)
.jpg)
.jpg)
.jpg)
.jpg)
.jpg)
.jpg)
.jpg)
.jpg)
.jpg)
.jpg)
.jpg)
.jpg)
.jpg)
.jpg)
.jpg)
.jpg)
.jpg)
.jpg)
.jpg)
.jpg)
.jpg)
.jpg)
.jpg)
.jpg)
.jpg)
.jpg)
.jpg)
.jpg)
.jpg)
.jpg)
.jpg)
.jpg)
.jpg)
.jpg)
.jpg)
.jpg)
.jpg)
.jpg)
.jpg)
.jpg)
.jpg)
.jpg)
.jpg)
.jpg)
.jpg)
.jpg)
.jpg)
.jpg)
.jpg)
.jpg)
.jpg)
.jpg)
.jpg)
.jpg)
.jpg)
.jpg)
.jpg)
.jpg)
.jpg)
.jpg)
.jpg)
.jpg)
.jpg)
.jpg)
.jpg)
.jpg)
.jpg)
.jpg)
.jpg)
.jpg)
.jpg)
.jpg)
.jpg)
.jpg)
.jpg)
.jpg)
.jpg)
.jpg)
.jpg)