Snail Mail Card - Free Tutorial
Snail Mail Surprise Inside Card Tutorial
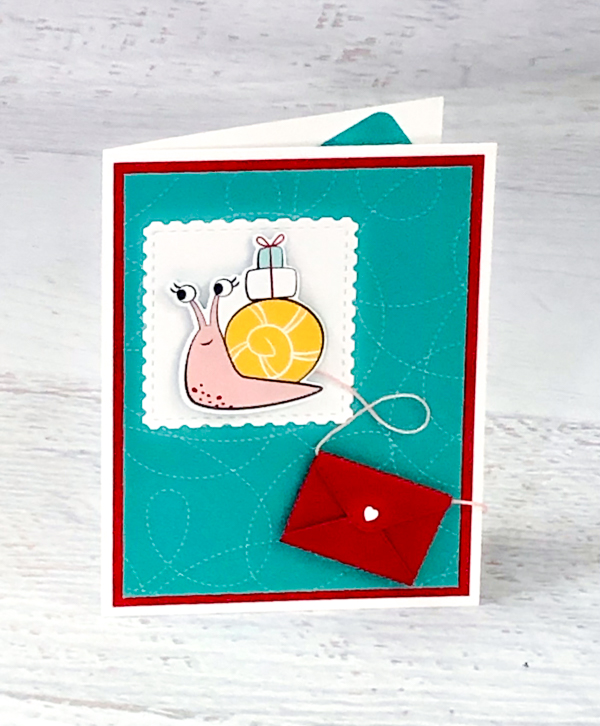
Let's shake off the blues, bash quarantine boredom, and add a bit of playfulness and whimsey to our days with the Snail Mail Suite! These adorable characters are sure to send a smile near and far.
I love that the coordinating dies work with both the stamp images and images in the Designer Series Paper. That means I can take my artistic time and colour or go the quick route with pre-coloured images from the paper. This surprise inside this card will delight anyone that opens it, so let's get creative!
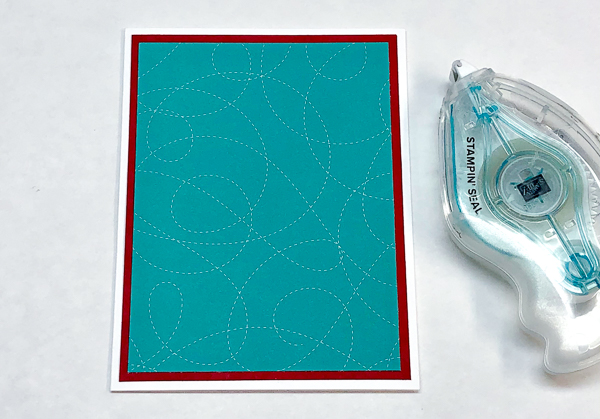
1. Card Layers
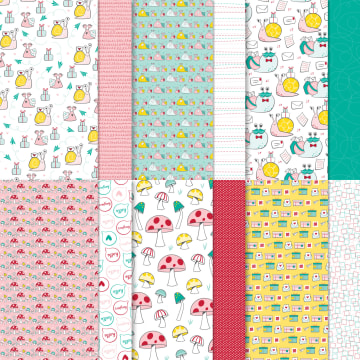
Cut Thick Basic White cardstock to 5-1/2" x 8-1/2". Score at 4-1/4" along 8-1/2" side. Layer 4" x 5-1/4" Real Red cardstock and 3-3/4" x 5" Snail Mail Designer Series Paper with Bermuda Bay stitched pattern on card front.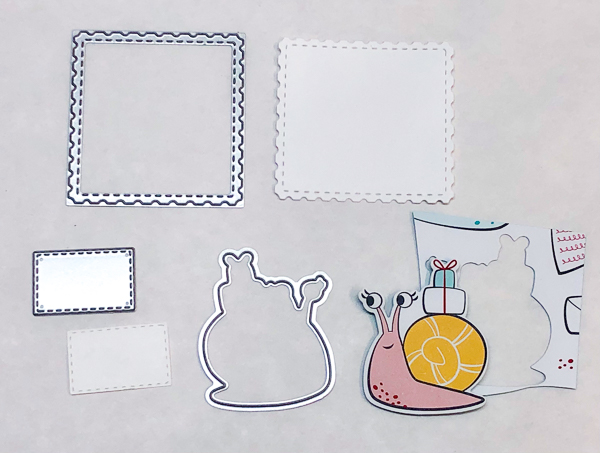
2. Die Cut
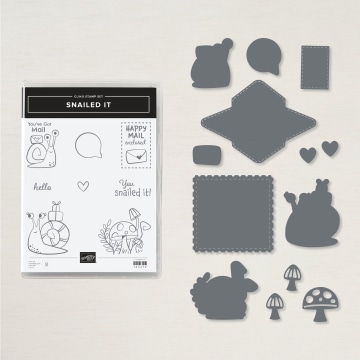
Die cut Basic White cardstock with the large postage stamp square die and small letter die (fits inside mini envelope) from the Snail Dies. Die cut snail image from Designer Series Paper or stamp the same snail image and die cut it, either way works great!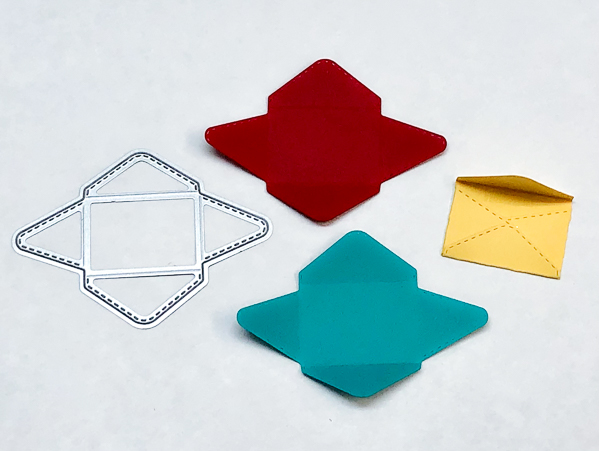
3. Die Cut Envelopes
Die cut mini stitched envelopes, one each, in Bermuda Bay, Real Red, and Daffodil Delight. Fold along score lines and burnish with a Bone Folder. Note one large flap is slightly taller than the other, the taller one is the top flap.
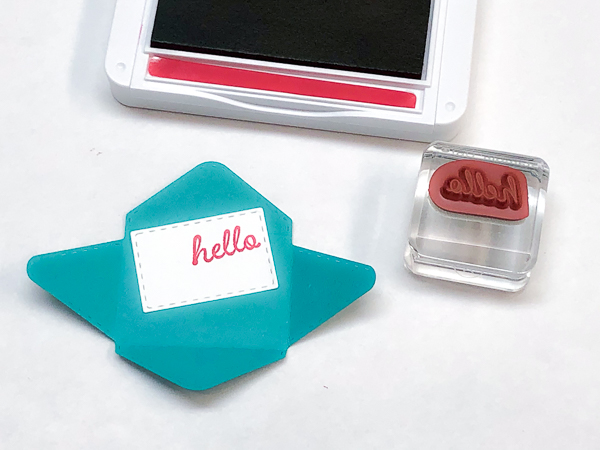
4. Stamp
Stamp "hello" from Snailed It stamp set onto top right corner of the die cut letter with Real Red ink. Adhere inside Bermuda Bay envelope so it overlaps onto the top flap.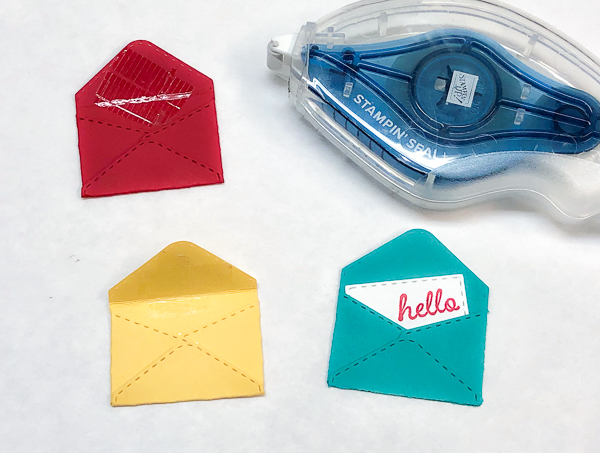
5. Fold Envelopes
Use a strong adhesive like Stampin' SEAL+ or Tear & Tape to adhere the mini envelopes. Fold the two small side flaps in first and then add more adhesive and fold up the bottom flap. Add adhesive to the top flaps but don't close yet.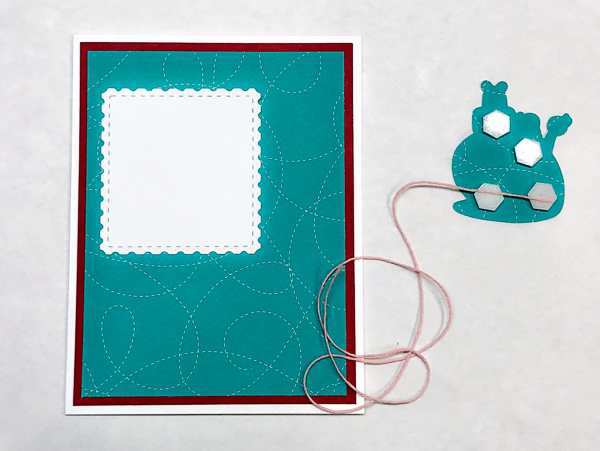
6. Add Snail
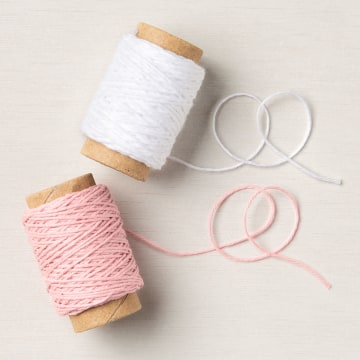
Adhere the large square die cut postage stamp to the card front near the top left corner. Cut an 18" piece of the Blushing Bride twine from Snail Mail Twine Combo Pack. Add Stampin' Dimensionals to the back of the die cut snail. Adhere one end of the twine behind the snail with the Stampin' Dimensionals.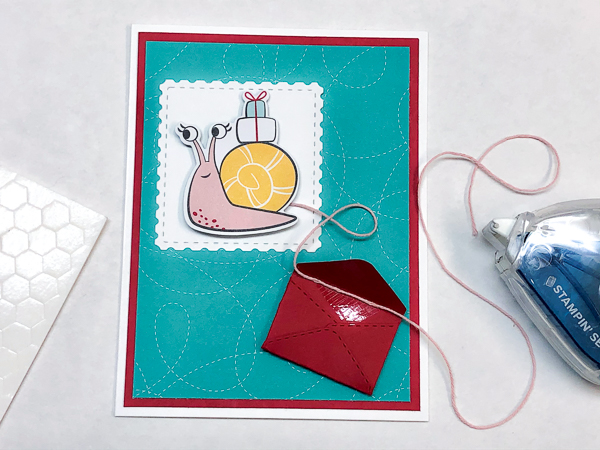 7. Add Envelope
Use Stampin' Dimensionals or Stampin' SEAL+ to adhere the Real Red envelope to the bottom right corner of the card front. Loop the twine once and then lay it across the envelope. Fold and adhere envelope to hold twine in place.
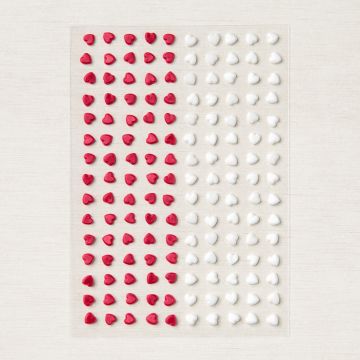
8. Add Heart
Add a heart from the self-adhesive Resin Hearts to the Real Red envelope flap.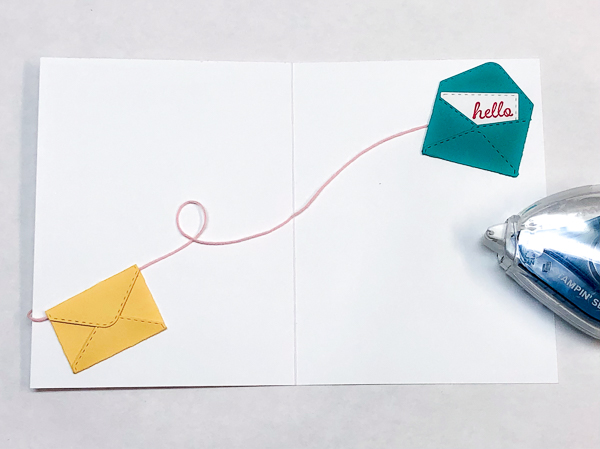
9. Add Inside Envelopes
Adhere Daffodil Delight envelope inside the card on the bottom left corner. Lay the twine over the envelope and close the flap. Lay the twine loosely across the open card and adhere to the top right corner with Stampin' SEAL+ or Tear & Tape. Cover end of twine with the Bermuda Bay.SUPPLIES:
SHOP NOW and earn Extended Sale-a-Bration rewards from Christine
I decided to extend Sale-a-Bration for my customers as long as I have supplies.
Contact me when your order has been sent and request my list of available SAB product.
Happy stamping and shopping!
TAKE ME BACK TO THE TOP
Current Host Code
CLICK TO SHOP WITH HC


Information and Registration
for all our Joint Crafting Events
Free Newsletter!

Paper Pumpkin
SIGN ME UP!

Share With Friends
Most Recent Blog Posts
- FREE SHIPPING - DEC 14
- FREE SHIPPING from Oct 9th to 11th
- Stamp another Stack of Christmas Cards with Kevin & Christine
- Let the fun begin - again …
- Why wait? Join us now!
- Fitting Florets for any Occasion
- Festive Window Wishes
- Starter Kit + = No brainer!
- Perched in a Tree
- Awash in Beauty, so gorgeous!
