It's a Tag Buffet - Free Tutorial
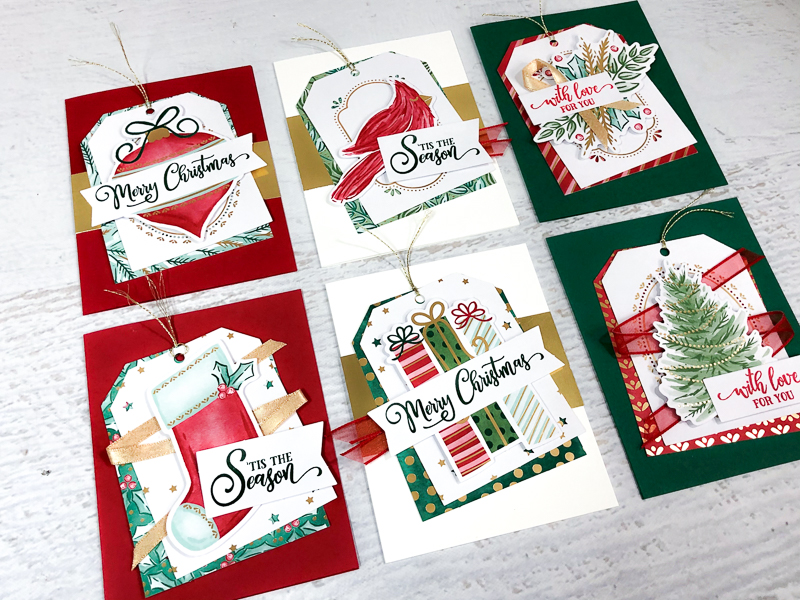
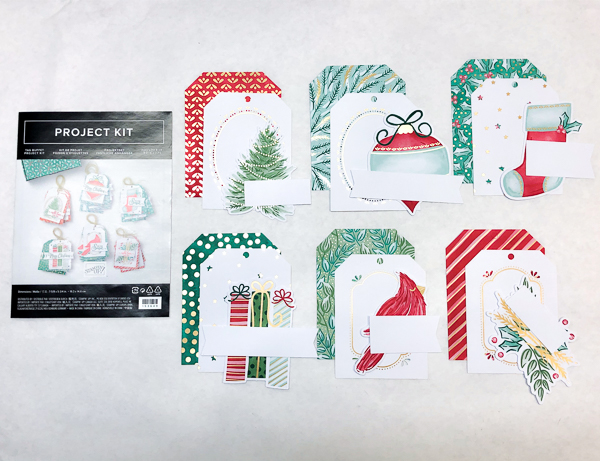
It is always fun to take something and re-purpose it to something else. The Tag Buffet Project Kit is ideal for this. This kit is an awesome value, it includes 30 tags, 5 each of 6 designs and a sturdy designer box for storing or gifting. These tags are big, detailed, and have gold foil accents, which makes them perfect for converting them into the focal point on cards.
This month's tutorial is perfect for making a bunch of cards without spending a lot of time, so it's a real win-win in my book. The Tag Buffet Project Kit is easy to dismiss as just tags, but I think you'll see it can be so much more!
In this tutorial I will share how to create a card for each of the 6 tag designs. You can mix and match tags and cards so that you give a gift with a coordinating tag and card, or you can make all 30 of the tags into cards, it is up to you!
If you would like to make even more projects with this kit, join us for Craft Day In A Box, "Light" option is still available.
Let's go create something beautiful!
Tag Buffet Tags Step-Up to Create Cards
 1. Sort Tag Pieces
Sort out your Tag Buffet tag, image, and label pieces just like is shown in the instructions included with the kit. Supplies listed above are for 6 cards, if you want to make more just add up the supplies.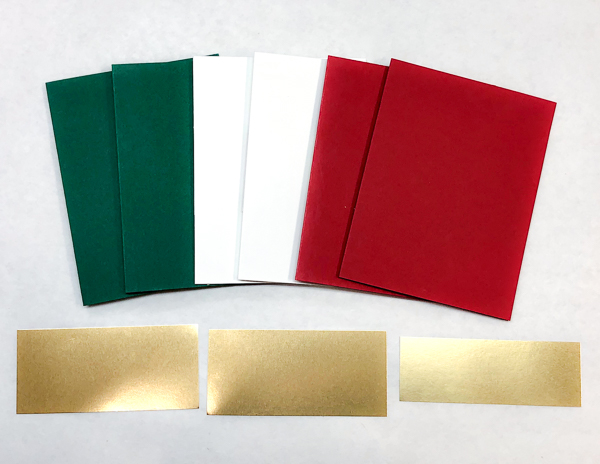 2. Cut & Score
Cut two 5-1/2" x 8-1/2" card bases each from Real Red, Shaded Spruce, and Thick Whisper White cardstock. Score each at 4-1/4" along the 8-1/2" side. Cut Gold Foil Sheet to create two 2" x 4-1/4" pieces and one 1-1/2" x 4-1/4" piece.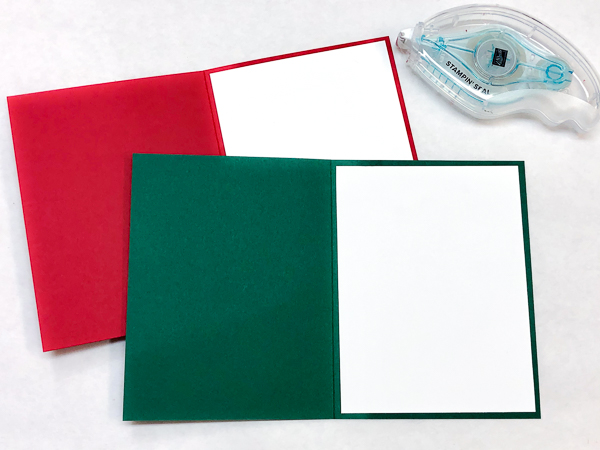 3. Add Inside Layers
Cut four 4" x 5-1/5" pieces of Whisper White cardstock. Adhere one inside each Real Red and Shaded Spruce card as a writing area. 4. Stamp Greetings
Stamp greetings from the Tag Buffet stamp set onto the tag labels as shown using Real Red and Shaded Spruce ink.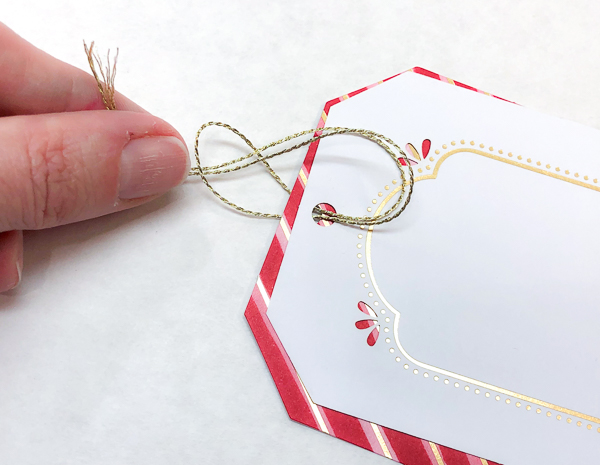 5. Add Centre Strip
Center the middle strip and adhere in place. 6. Add Ribbon Zig-Zag
For the stocking and tree tags, cut 12" piece of the Gold Shimmer and Real Red Sheer ribbons. Add a stripe of Stampin' SEAL down the center of the white tag layer. Lay the ribbon across the tag in a zig zag starting at the top right and ending at the bottom left. 7. Shaded Spruce Cards
Gather the Shaded Spruce cards. Add the tags at an angle using Stampin' Seal. Add the greenery and tree images with Stampin' Dimensionals. Use 6" of Gold Shimmer ribbon to create a crossed ribbon. Adhere to card with Glue Dots. Add greetings to both cards.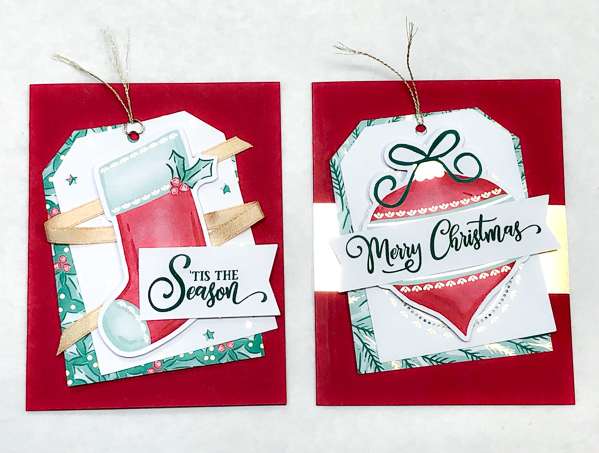 8. Real Red Cards
Gather the Real Red cards. Adhere the 1-1/2" x 4-1/4" Gold Foil strip across one. Add the tags at an angle using Stampin' Seal. Add the stocking over the ribbon zig zag and the ornament to the other with Stampin' Dimensionals. Add greetings to both cards.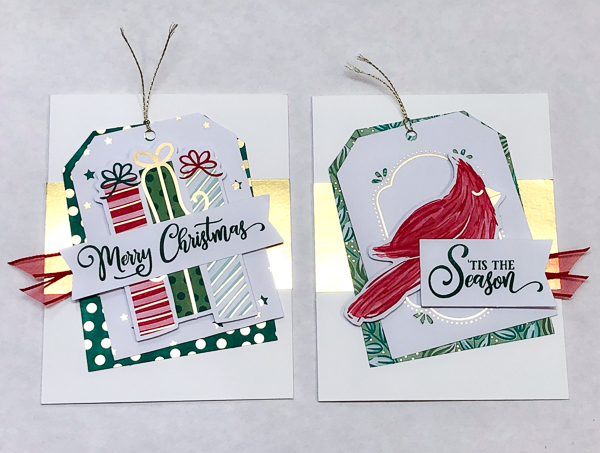 9. Whisper White Cards
Gather the Whisper White cards. Adhere a 2" x 4-1/4" Gold Foil strip across each one. Add the tags at an angle using Stampin' Seal. Add the cardinal and gifts with Stampin' Dimensionals. Cut two 4" pieces of Real Red Sheer ribbon. Fold in a "V" and adhere behind one of of each greeting label with Glue Dots. Add greetings to both cards.SUPPLIES for 6 cards, one each of 6 designs:
Kit: Tag Buffet (#153649)
Stamps: Tag Buffet (#153612)
Ink: Real Red (#147084), Shaded Spruce (#147088)
Paper: 1-Thick Whisper White cardstock (#140272), 1-Whisper White cardstock (#100730), 1-Real Red cardstock (#102482), 1-Shaded Spruce cardstock (#146981), 1/6 sheet-Gold Foil Sheets (#132622)
Embellishments: 20"-Real Red 3/8" Sheer Ribbon (#153535), 20"-Gold 1/4" Shimmer Ribbon (#152156)
Adhesives: Stampin' Dimensionals (#104430), Mini Glue Dots (#103683), Stampin' SEAL (#152813)
Step-up Options: Step the the design even more with self-adhesive Wonderful Gems (#153536), stamp the card bases with images from the Tag Buffet stamp set, or emboss the card bases with the Winter Snow Embossing Folder (#153577)




TAKE ME BACK TO THE TOP



 Each month a fully designed project kit arrives in a delightful box filled with stamps, ink, and paper—everything cut and ready to go so you can skip to the fun. Just think of it as creativity in a box.
