Warm Hugs Note Card - Free Tutorial
Happy times spent enjoying a cup of coffee with friends or the joy of a sweet, hot cocoa after playing in the snow are heartwarming traditions of the holiday season.
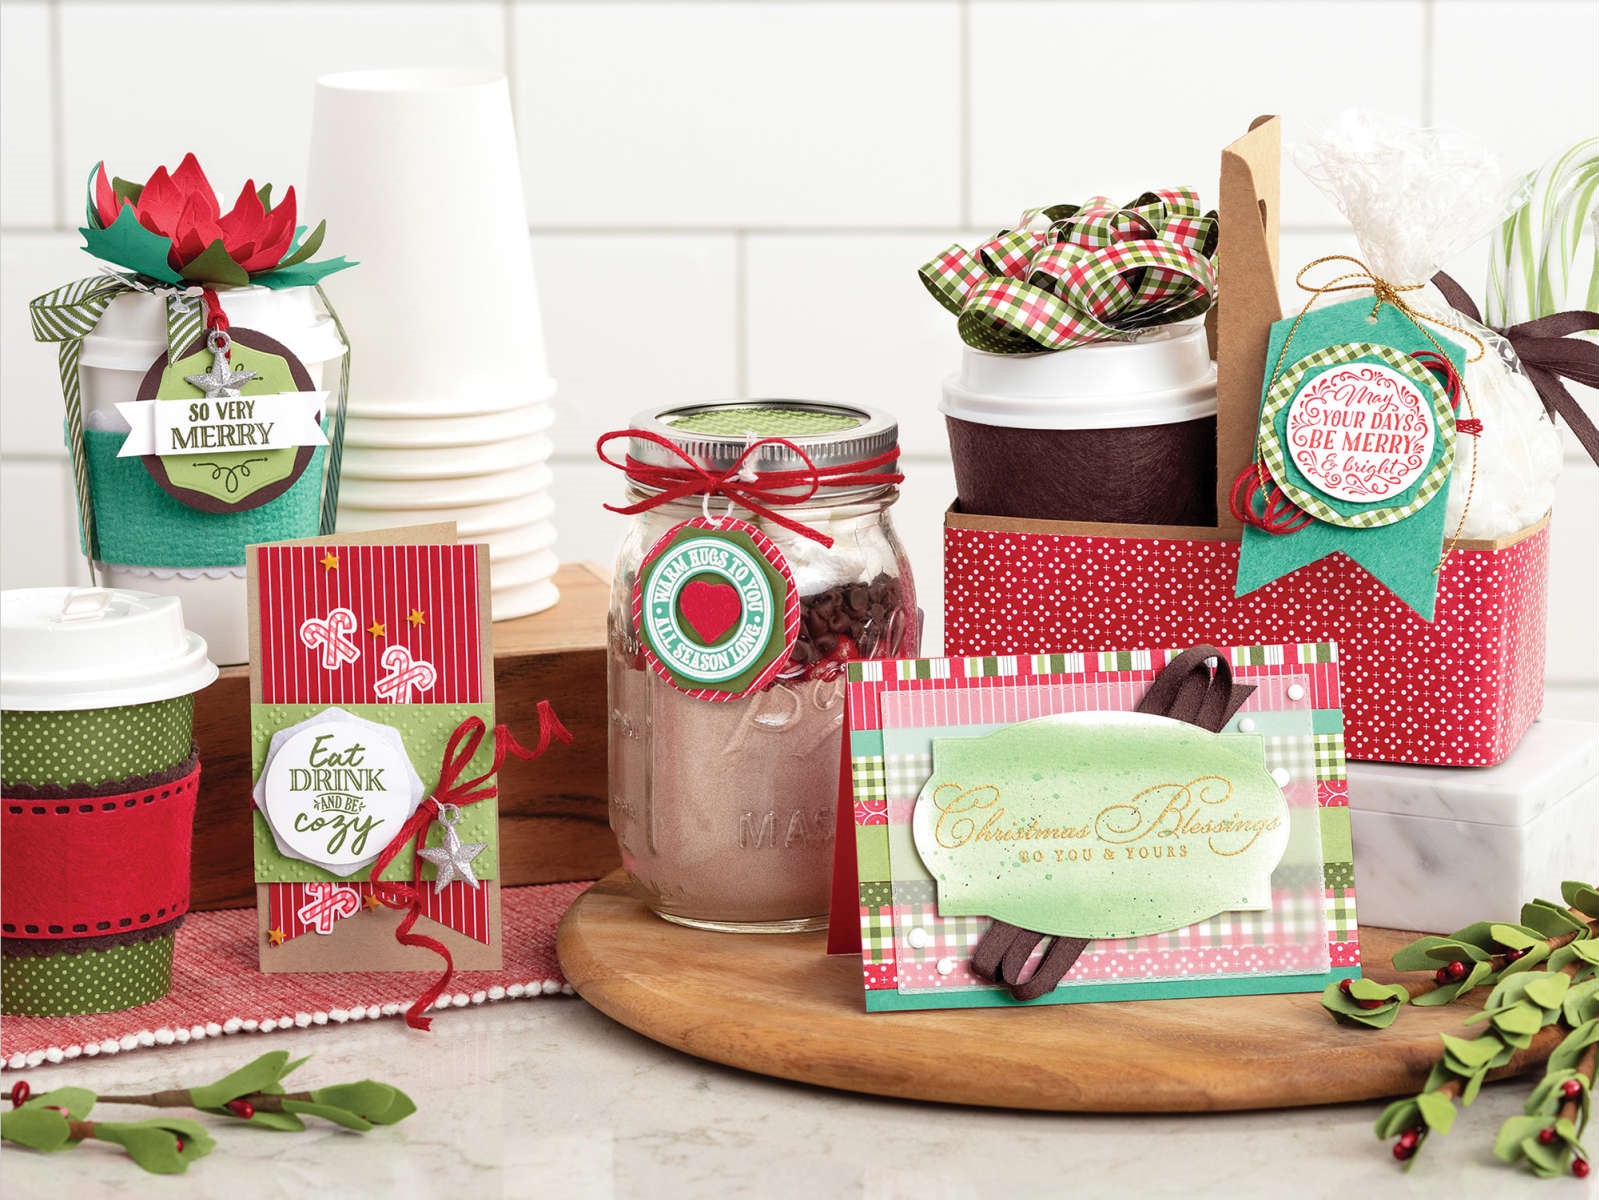
With so many holiday memories wrapped up in a shared treat, it is no wonder the Heartwarming Hugs Suite is a huge hit this season. Whether you fill the Mini Coffee Cups with treats or create custom packaging for a gift card from a favourite coffee shop, you will find this suite is the perfect way to share the warmth of the holiday seasons with those you love.
The Warm Hugs stamp set and coordinating Warm Wraps Dies go together like hot chocolate and marshmallows. Bundle the pair and save 10% with the Warm Hugs Bundle.
Today I am sharing a sweet note card tutorial that showcases an unexpected way to use dies to create an eyelet background design.
Be happy, create and stamp a little ....

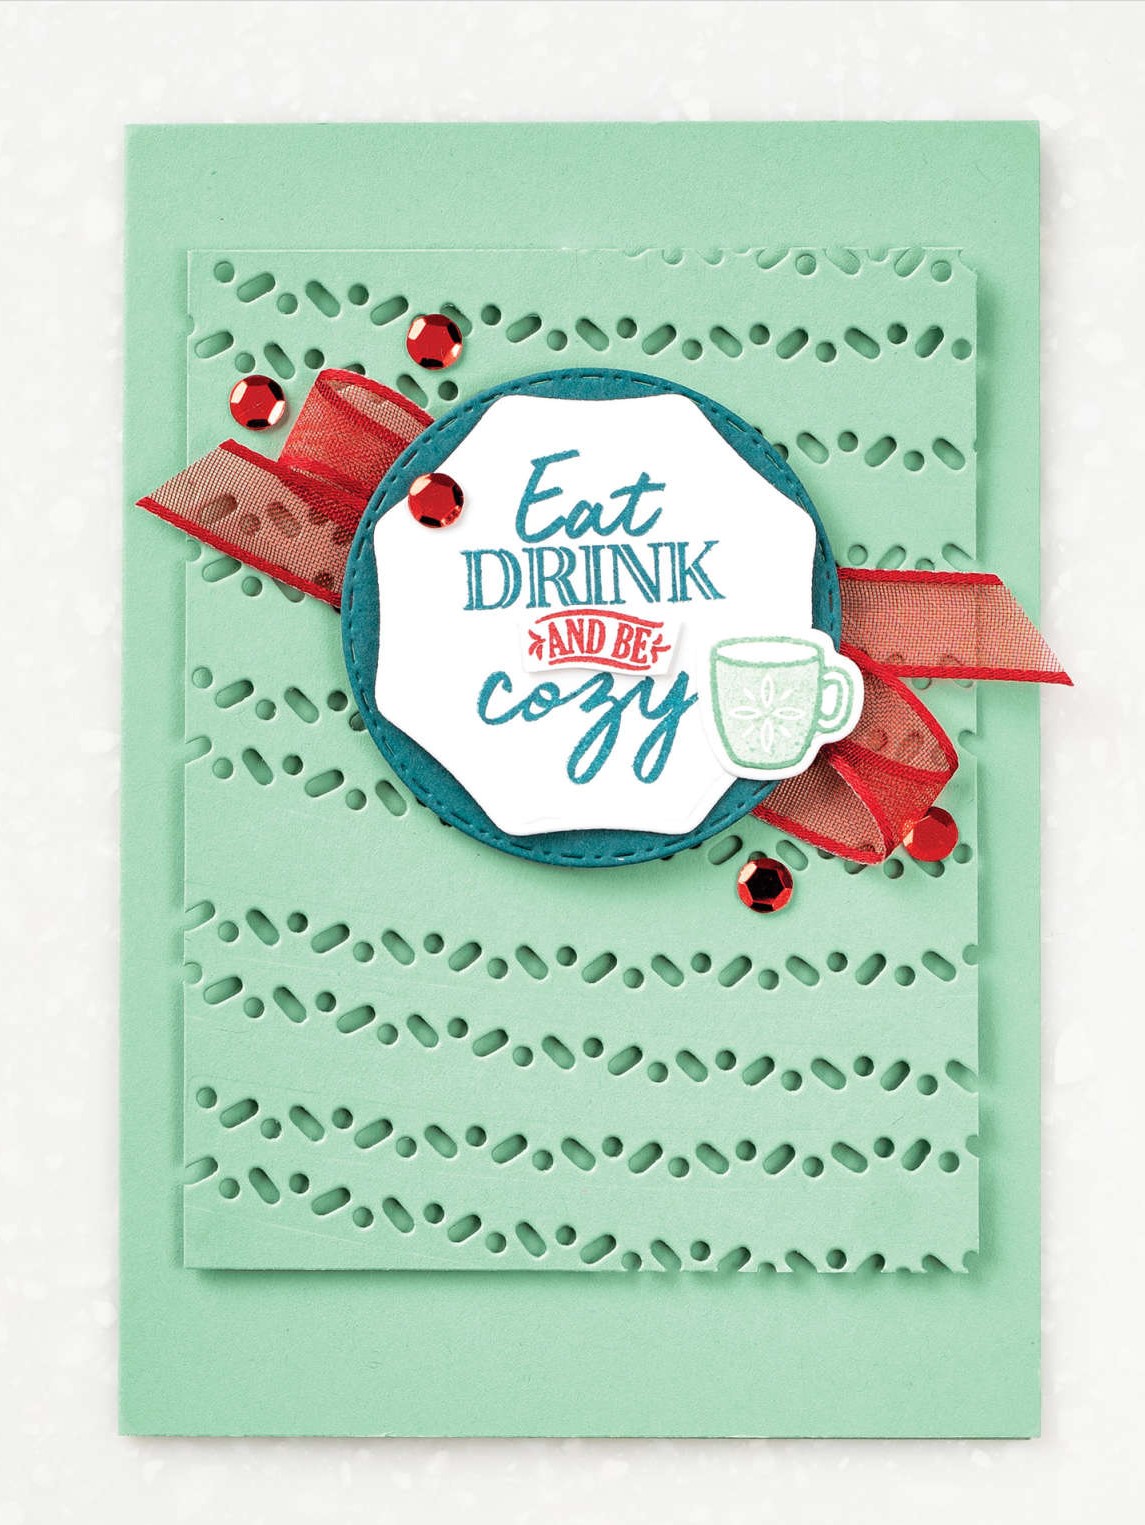
WARM HUGS NOTE CARD
INSTRUCTIONS:
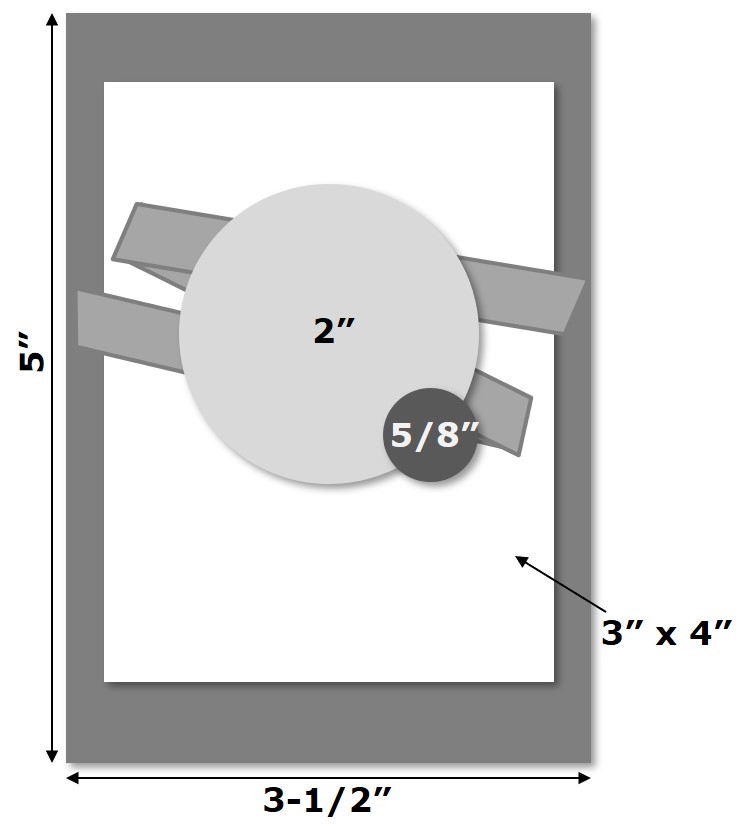
1) Cut Mint Macaron cardstock to 3-1/2" x 5". Adhere to front of a Whisper White Note Card.
2) Place the three Warm Wraps die strips that cut out an eyelet-type pattern across a 3" x 4" piece of Mint Macaron cardstock and die cut. Repeat die cutting about four times, to create a cut-out design across the entire cardstock piece. Don't worry about keeping the strips straight, a variation in angles adds to the back ground effect.
3) Place Mini Stampin' Dimensionals on the back of the cardstock where they won't show through the die cut pattern. Adhere to card front.
4) Cut a 12" piece of Real Red Sheer Ribbon. Use Mini Glue Dots to adhere it to the card front in a zig-zag pattern. Keep the Mini Glue Dots towards the centre where they will be covered by the greeting circles.
5) Ink the small coffee mug image from the Warm Hugs stamp set with Mint Macaron ink. Stamp off once and then stamp onto scrap Whisper White cardstock. Die cut with coordinating Warm Wraps Die.
6) Stamp greeting on scrap Whisper White cardstock with Pretty Peacock ink. Clean stamp and stamp the same greeting again in Real Red ink.
7) Die cut the Pretty Peacock stamped greeting with the octagonal shaped die.
8) Hand cut out the "AND BE" portion from the Real Red stamped greeting. Adhere over top the "AND BE" portion of the Pretty Peacock stamps greeting.
9) Die cut Pretty Peacock cardstock with the large circle die. Layer greeting and circle die cuts and adhere to card front over the ribbon with Mini Stampin' Dimensionals.
10) Add die cut mug with a Mini Glue Dot and adhere Real Red sequins to the card front using the Fine-Tip Glue Pen.
SUPPLIES:
STAMPS: Warm Hugs stamp set (#153478)PAPER: Whisper White cardstock (#100730), Mint Macaron (#138337), Pretty Peacock cardstock (#150880), Whisper White Note Cards & Envelopes (#131527)
INK: Mint Macaron (#147106), Pretty Peacock (#150083), Real Red (#147084)
TOOLS: Warm Wraps Dies (#153521)
ADHESIVE: Mini Glue Dots (#103683), Fine-Tip Glue Pen (#138309), Mini Stampin' Dimensionals(#144108)
EMBELLISHMENTS: Real Red 3/8" Sheer Ribbon (#153535), Sequins For Everything (#153556)
TIPS: The Take Your Pick Tool (#144107) with the Take Your Pick Die Brush Tip (#149655) can be helpful when using detailed dies. Dies work best when they are clean with no paper pieces stuck in them. The Die Brush helps to easily remove paper from dies with detailed designs and small cut-out areas.
In case you need any of the above supplies, please support my small business by shopping in my ONLINE STORE - THANK YOU!
TAKE ME BACK TO THE TOP
Current Host Code
YNHG9GWF
CLICK TO SHOP WITH HC
See here how to use a Host CodeCLICK TO SHOP WITH HC


Information and Registration
for all our Joint Crafting Events
Free Newsletter!

Paper Pumpkin
SIGN ME UP!

Share With Friends
Most Recent Blog Posts
- FREE SHIPPING - DEC 14
- FREE SHIPPING from Oct 9th to 11th
- Stamp another Stack of Christmas Cards with Kevin & Christine
- Let the fun begin - again …
- Why wait? Join us now!
- Fitting Florets for any Occasion
- Festive Window Wishes
- Starter Kit + = No brainer!
- Perched in a Tree
- Awash in Beauty, so gorgeous!
