Peony Garden Suite - Watercoloured Peony Card Tutorial
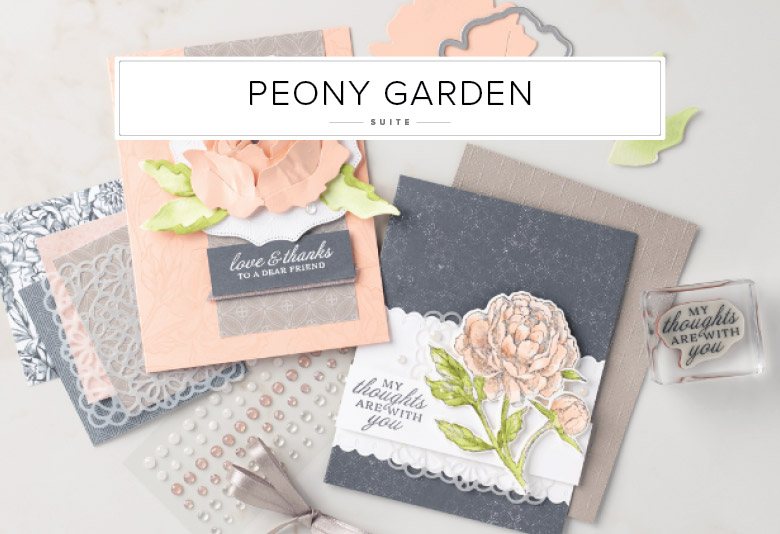
Some images are timeless and endure through the changes of years and styles. The Peony Garden Suite is a perfect example of timeless elegance. From simple stamping to over-the-top, this suite covers all the bases. Use traditional colours, stamping and die-cutting to create a peony that looks like it came right out of grandma's garden or create a simple modern, monochrome look with the flower stamped in a neutral colour on Whisper White. I think you'll find yourself reaching for this suite for many occasions.
This lovely tutorial includes two ways to watercolour and uses the Peony Dies to build a gorgeous 3-D flower. Let's make something beautiful!
Be happy, create and stamp a little ...
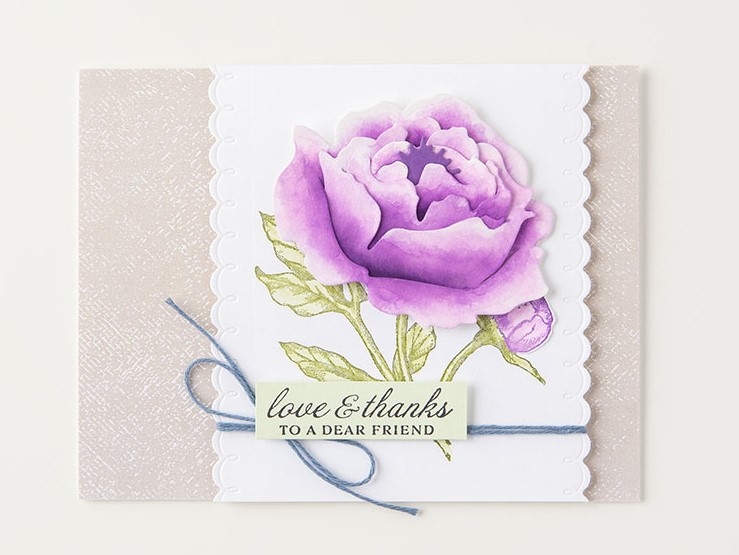
WATERCOLOURED PEONY CARD
INSTRUCTIONS:
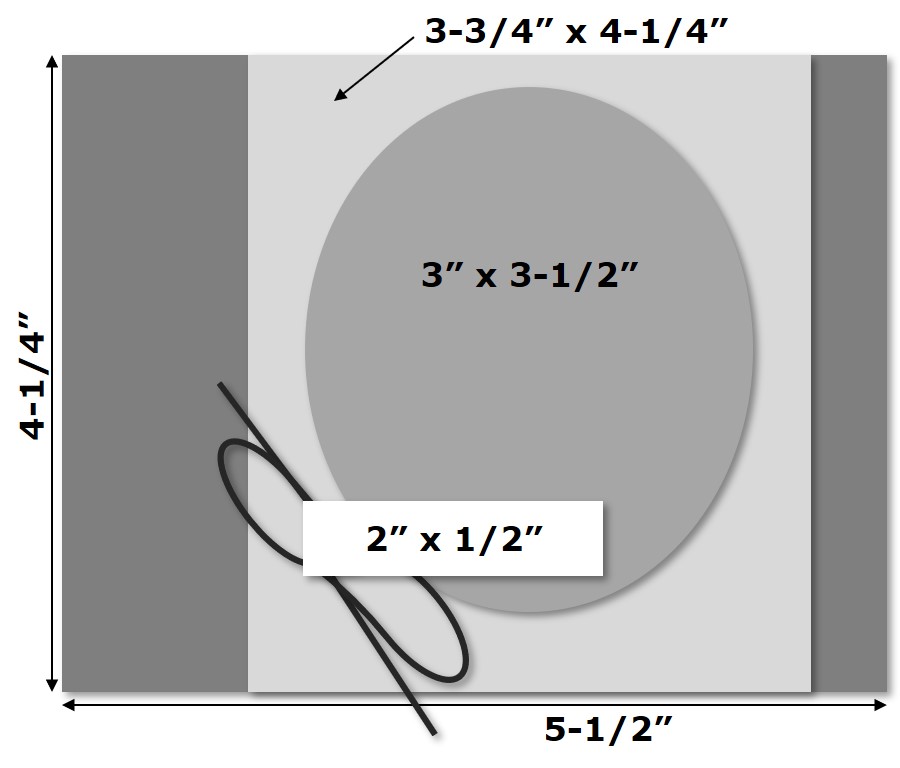
1. Cut Thick Whisper White cardstock to 5-1/2" x 8-1/2". Score at 4-1/4" along the 8-1/2" side.
2. Cut a piece of the Sahara Sand woven pattern paper from the Neutrals 6" x 6" Designer Series Paper to -1/2" x 4-1/4". Adhere to the card front.
3. Cut Whisper White cardstock to 4" x 4-1/4". Use the scallop die from the Peony Dies to cut along both 4-1/4" long edges. The finished piece will be about 3-3/4" wide by 4-1/4" tall.
4. Stamp full flower and stem image on the Whisper White layer with Old Olive ink. Use a Blender Pen to blend the stem, which will colour it in lightly using the ink from the stamped image.
5. Clean the stamp and your Blender Pen.
6. Stamp just the peony bud area on scrap Whisper White cardstock with Gorgeous Grape ink. Again colour in the bud using a Blender Pen and the ink picked up from the stamped image.
7. Use Paper Snips or the large flower and leaf die to cut out the bud. Use Paper Snips to cut the bud off the stem. Adhere to the coloured stem.
8. Wrap Misty Moonlight/Silver Baker's Twine from the Flowers For Every Season Ribbon Combo Pack around the scalloped edged layer twice and tie a bow.
9. Stamp greeting from Prized Peony stamp set on 2" x 1/2" Soft Sea Foam cardstock with Jet Black StazOn ink. Adhere over twine with Stampin' Dimensionals.
10. Adhere scalloped layer to the card front with Stampin' SEAL or Stampin' Dimensionals.
11. Die cut Fluid 100 Watercolor Paper with the Peony Dies. There are four dies needed to create the flower petals. See image below.
12. Squeeze the closed Gorgeous Grape ink pad pressing on the lid to transfer colour from the pad onto the lid. Open the ink pad and use the ink in the lid with that Water Painters to watercolour the die-cut petals. Start with a light wash all over, then add darker watercolour layers with the Water Painters. Allow to dry.
13. To assemble the peony flower use the image below and these steps. Each die cut petal layer has a slit cut into it. On each side of the slit there are scored lines. For a more 3D effect, fold the sides next to the slit so the bottom portion folds up towards the top. For a flatter flower do not fold on the score lines. Start by slipping the smallest die cut into the slit or pocket in the next largest die cut. Adhere in place with SEAL+ or Mini Glue Dots. Add the layered die cuts into the next die cut slit. Repeat until all four layers are together.
14. Die cut the flower centre from Gorgeous Grape cardstock and add to centre of peony with Mini Glue Dots.
15. Adhere the peony to the card with Glue Dots or Stampin SEAL+.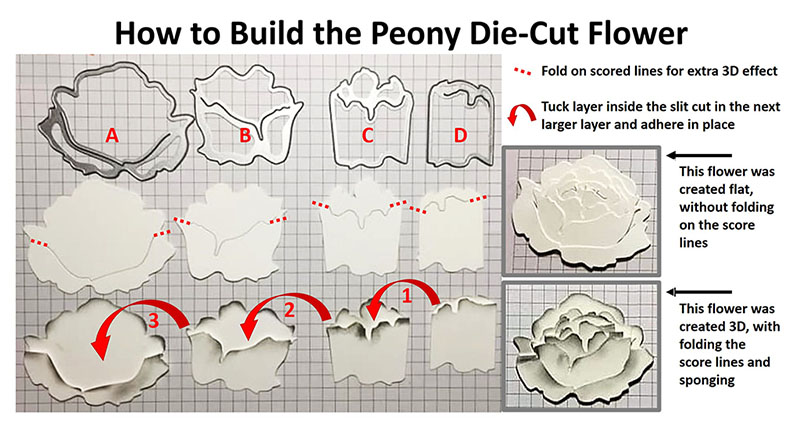
SUPPLIES:
STAMPS: Prized Peony (#152504)
PAPER: Whisper White (#100730), Whisper White Thick (#140272), Gorgeous Grape (#146987), Soft Sea Foam (#146988), Fluid 100 Watercolor Paper (#149612), Neutrals 6 X 6" (15.2 X 15.2 Cm) Designer Series Paper (#152485)
INK: Jet Black StazOn (#101406), Old Olive (#147090), Gorgeous Grape (#147099)
TOOLS: Blender Pens (#102845), Water Painters (#151298), Peony Dies (#152701)
EMBELLISHMENTS: Flowers For Every Season Ribbon Combo Pack (#153620)
ADHESIVES: Stampin' SEAL (#152813), Stampin' Dimensionals (#104430), Stampin' SEAL+ (#149699), Mini Glue Dots (#103683)
TIPS: Create depth and shading in watercolouring by painting on a light wash layer and then adding light layers of colour to the area you want darker. Allow the paper to dry a bit between layers so it can absorb more ink, but not completely to avoid harsh lines.
In case you nee any of the above supplies, please support my small business by shopping in my ONLINE STORE - THANK YOU!
TAKE ME BACK TO THE TOP
Current Host Code
CLICK TO SHOP WITH HC


Information and Registration
for all our Joint Crafting Events
Free Newsletter!

Paper Pumpkin
SIGN ME UP!

Share With Friends
Most Recent Blog Posts
- FREE SHIPPING - DEC 14
- FREE SHIPPING from Oct 9th to 11th
- Stamp another Stack of Christmas Cards with Kevin & Christine
- Let the fun begin - again …
- Why wait? Join us now!
- Fitting Florets for any Occasion
- Festive Window Wishes
- Starter Kit + = No brainer!
- Perched in a Tree
- Awash in Beauty, so gorgeous!
