Label Me Punch - Ribbon Slider Tutorial
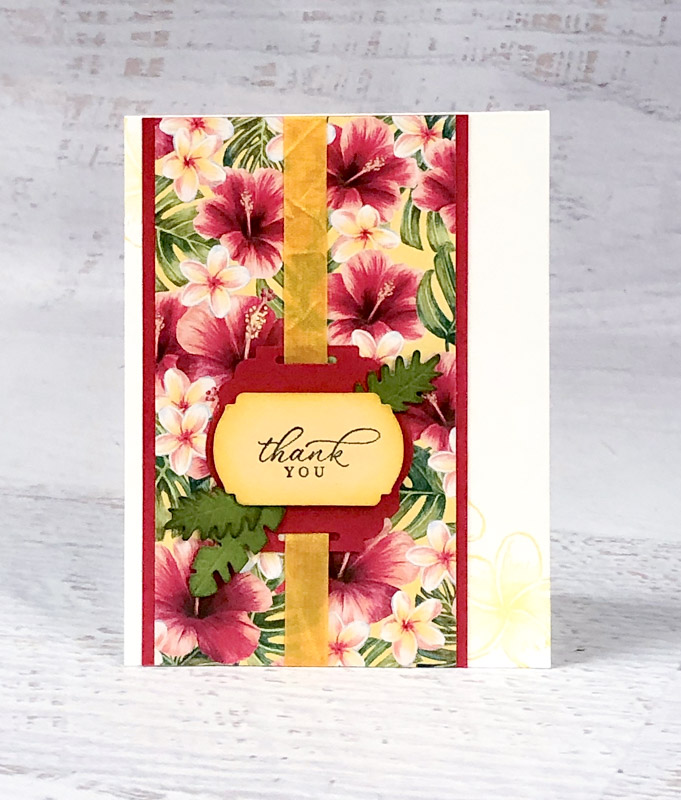
LABEL ME PUNCH RIBBON SLIDER
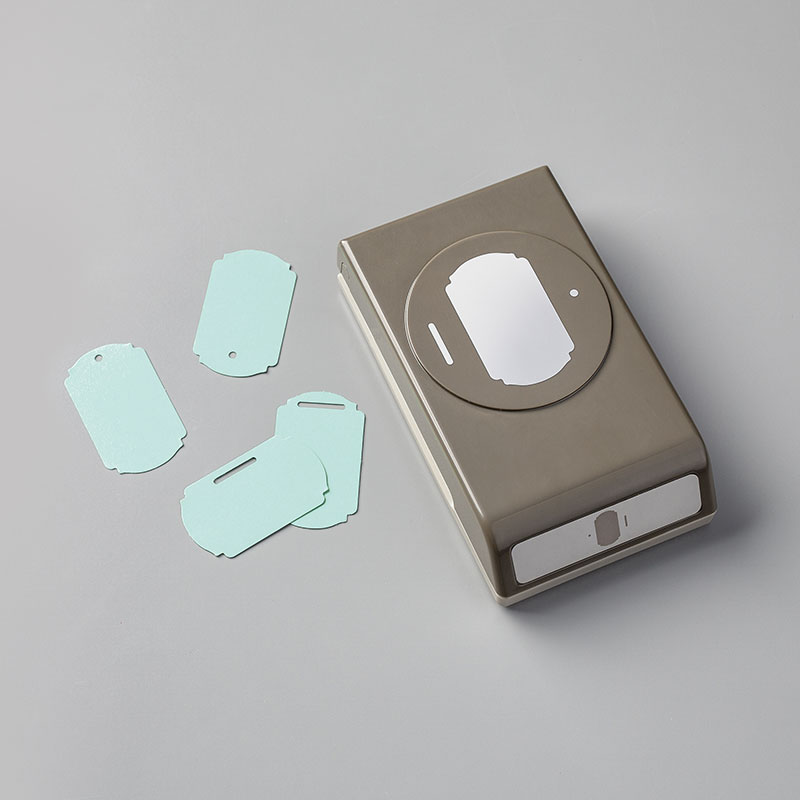
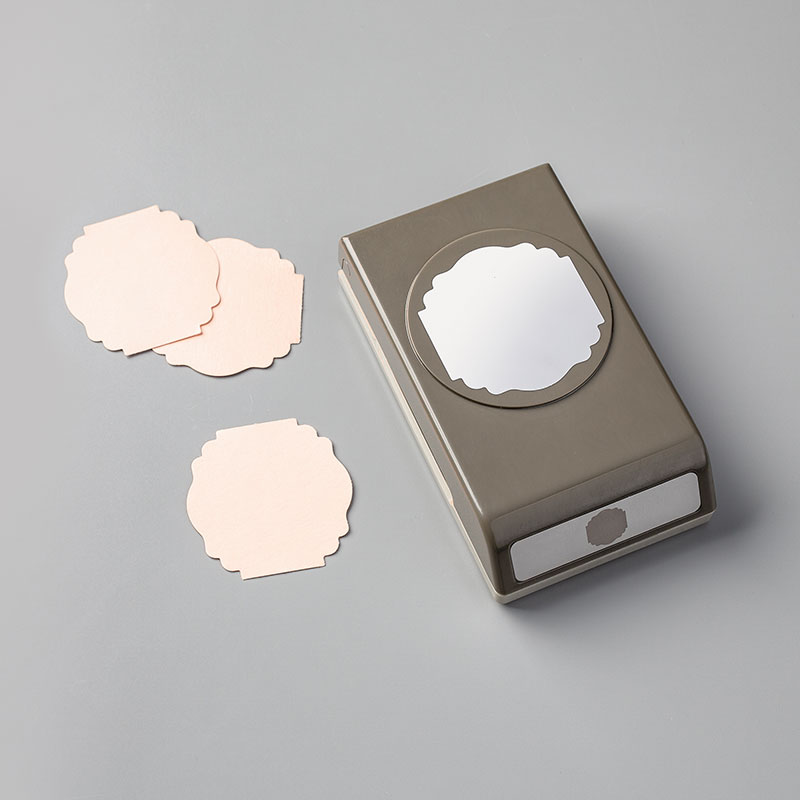
Punches are one of my go-to crafting tools. They make adding a greeting or accent quick and simple. It's even better when you have a couple punches that are designed to layer and coordinate like the Label Me Fancy (#151297) and Label Me Lovely (#151296) Punches from the Spring Mini.
Each punch is great on it's own and the Label Me Fancy Punch does triple-duty since it also has hole and slit punches. Combined they make creating tags, labels, and accents a cinch. I'm excited to share a not-so-obvious use for these punches.
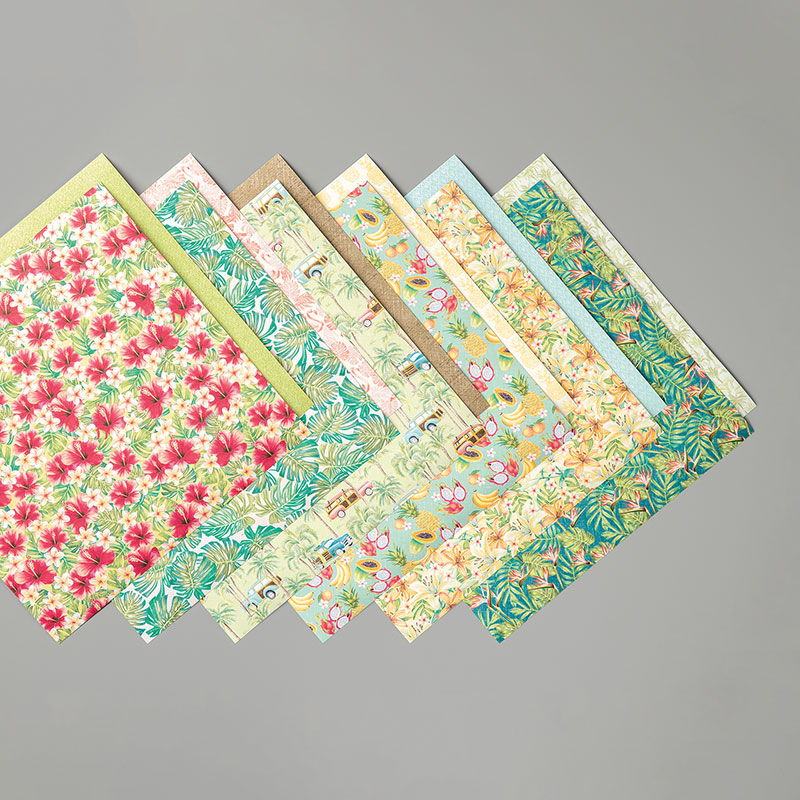
In this tutorial you'll learn how to create a ribbon slide! This card also features the gorgeous Tropical Oasis Designer Series Paper (#151252) and coordinating Timeless Tropical stamp and die bundle (#153811).
I think together they'll make a fabulous stamper-style tropical punch!
 1. Cut & Stamp
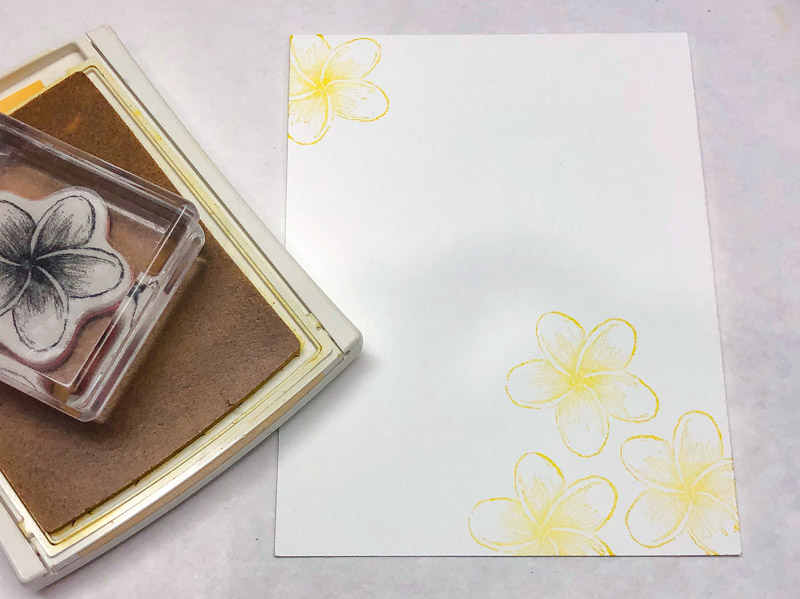
Cut Thick Whisper White cardstock to 4-1/4" x 11". Score at 5-1/2" along the 11" side. Stamp the small flower image from the Timeless Tropical stamp set several times at the top left and bottom right of the card with Daffodil Delight ink.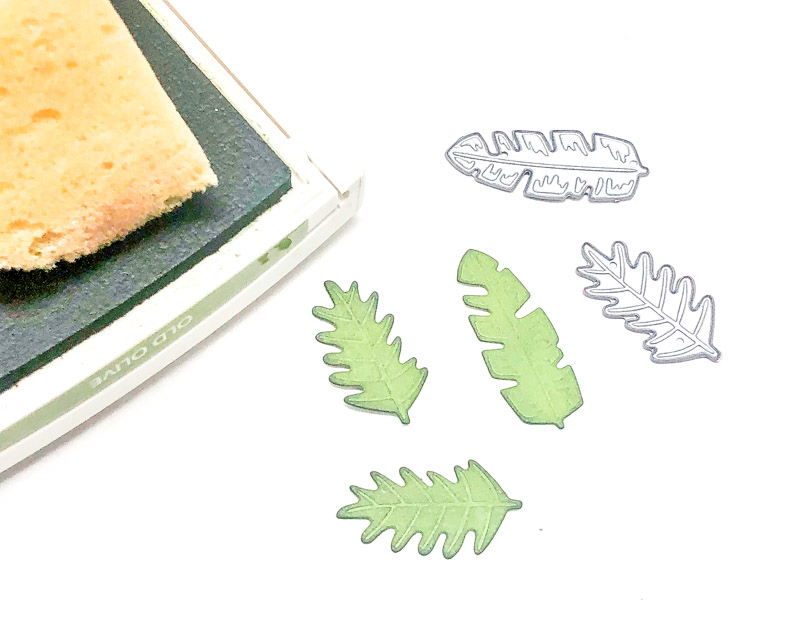 2. Die Cut Leaves
Die-cut scrap Old Olive cardstock with the two small solid leaf images from the In The Tropics dies. These dies cut and emboss. Cut 3 leaves total. Sponge the top and edges of leaves with Old Olive ink to enhance the embossing.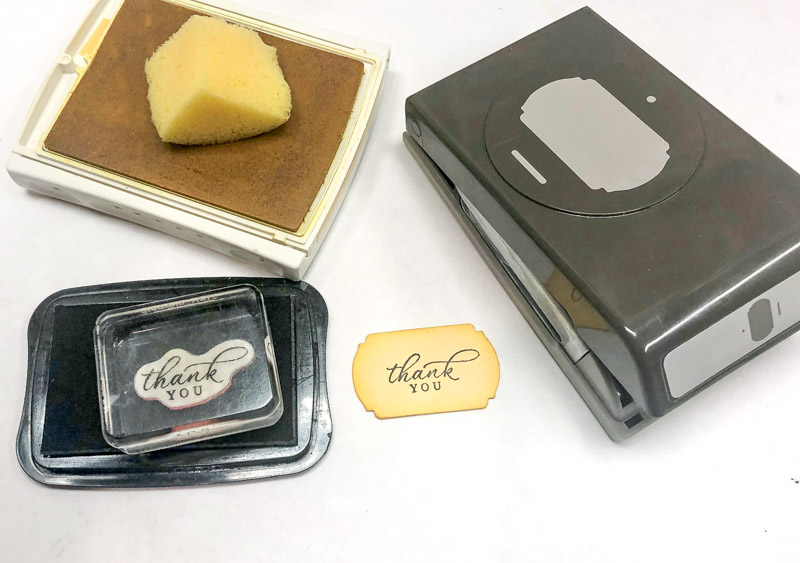 3. Stamp & Punch
Stamp greeting from the Timeless Tropics stamp set on So Saffron cardstock with Tuxedo Black Memento ink. Punch out greeting with the Label Me Fancy Punch. Sponge edges with Daffodil Delight ink.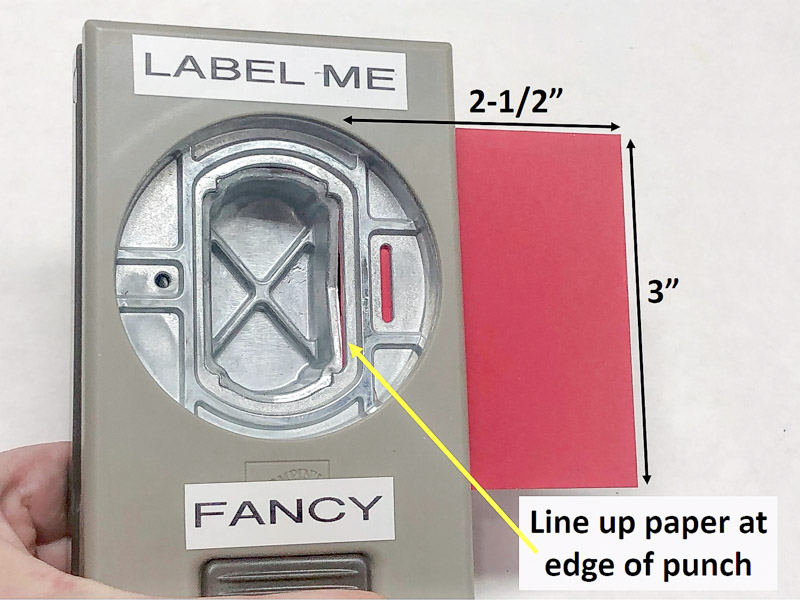 4. Create a Ribbon Slider
Cut Real Red cardstock to 2-1/2" x 3". Hold the Label Me Fancy punch upside down so you see the punching area. Hold cardstock in portrait position. Slide into the right edge of the punch until it is just even with the punch edge. Make sure the bottom edge of the paper is all the way down into the punch. Punch slit from the cardstock.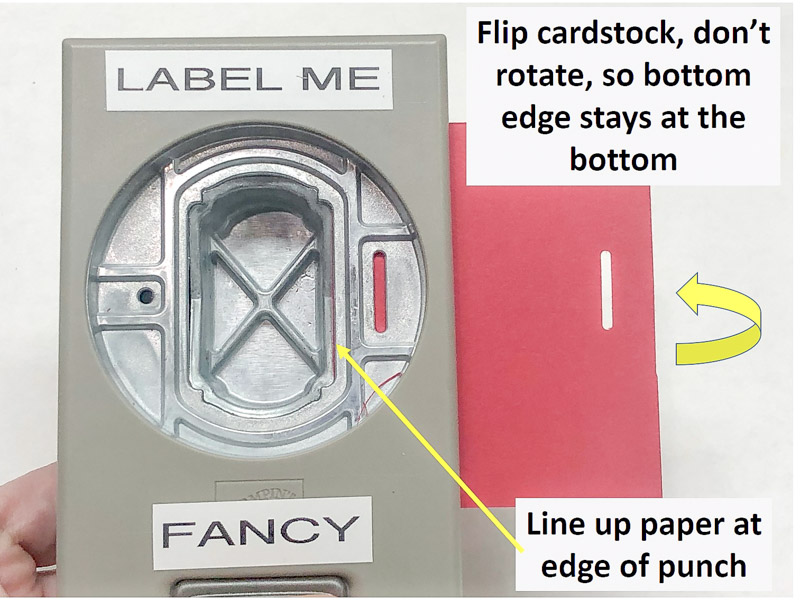 5. Ribbon Slider Second Step
Remove cardstock and flip (not rotate) it over so the same bottom edge stays down. Place opposite edge back into the punch from the right side just like the first time. Mack sure bottom edge is all the way into the punch. Punch another slit. Remove cardstock, the slits should be opposite each other and level with each other.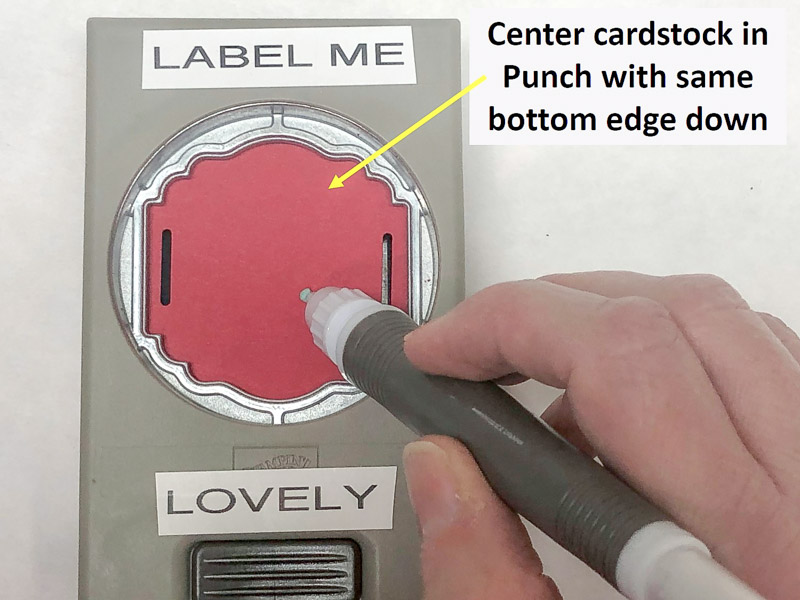 6. Ribbon Slider Third Step
Hold the Label Me Lovely Punch upside down so you see the punch area. Slide the cardstock with the slits into the punch with the same bottom edge all the way down into the punch. Use the putty tip of the Take Your Pick Tool to manoeuvre the cardstock until the slits are centred evenly in the punch and then punch it out.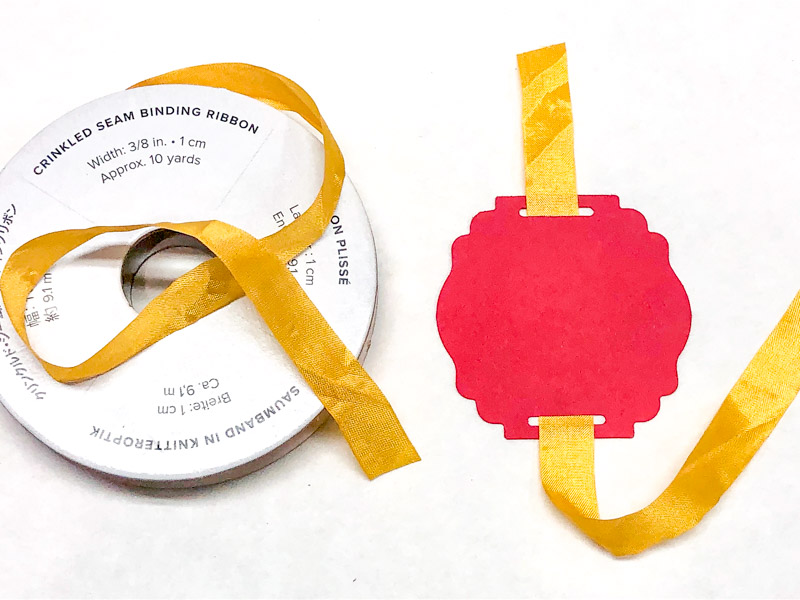 7. Ribbon Slider Last Step
Cut a 7" piece of Crushed Curry 3/8" Crinkled Seam Binding Ribbon. Thread the ribbon down through one punched slit and up through the other. The side with little ribbon showing will be the front of the ribbon slider.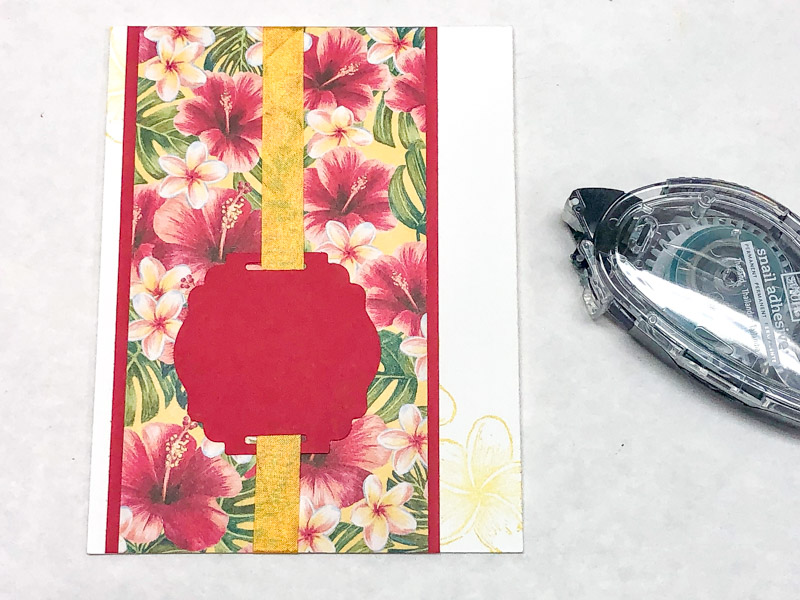 8. Layer & Add Ribbon
Adhere a 3" x 5-1/2" piece of Tropical Oasis Designer Series Paper to a 3-1/4" x 5-1/2" piece of Real Red Cardstock. Add adhesive to the back of the cardstock at the top and bottom and use it to hold the ribbon ends behind. Adhere the layers to the card about 1/8" from the left edge.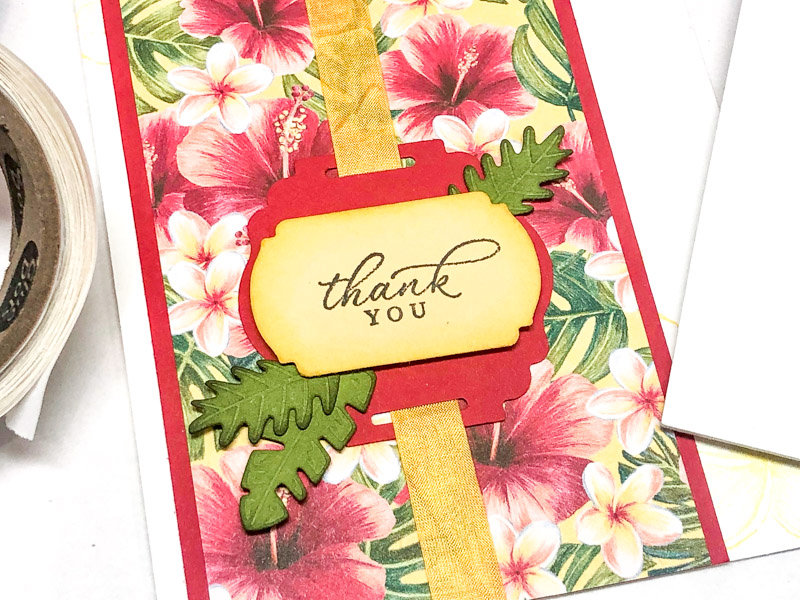 9. Embellish
Add the stamped and punched greeting to the ribbon slider with Stampin' Dimensionals. Use Glue Dots to adhere the die cut leaves under the bottom left and top right edges of the greeting. The ribbon slider card is now ready to send along a happy aloha!SUPPLIES
TAKE ME BACK TO THE TOP


 Each month a fully designed project kit arrives in a delightful box filled with stamps, ink, and paper—everything cut and ready to go so you can skip to the fun. Just think of it as creativity in a box.

.jpg)
.jpg)
.jpg)
.jpg)
.jpg)
.jpg)
.jpg)
.jpg)
.jpg)
.jpg)
.jpg)
.jpg)
.jpg)
.jpg)
.jpg)
.jpg)
.jpg)
.jpg)
.jpg)
.jpg)
.jpg)
.jpg)
.jpg)
.jpg)
.jpg)
.jpg)
.jpg)
.jpg)
.jpg)
.jpg)
.jpg)
.jpg)
.jpg)
.jpg)
.jpg)
.jpg)
.jpg)
.jpg)
.jpg)
.jpg)
.jpg)
.jpg)
.jpg)
.jpg)
.jpg)
.jpg)
.jpg)
.jpg)
.jpg)
.jpg)
.jpg)
.jpg)
.jpg)
.jpg)
.jpg)
.jpg)
.jpg)
.jpg)
.jpg)
.jpg)
.jpg)
.jpg)
.jpg)
.jpg)
.jpg)
.jpg)
.jpg)
.jpg)
.jpg)
.jpg)
.jpg)
.jpg)
.jpg)
.jpg)
.jpg)
.jpg)
.jpg)
.jpg)
.jpg)
.jpg)
.jpg)
.jpg)
.jpg)
.jpg)
.jpg)
.jpg)
.jpg)
.jpg)
.jpg)
.jpg)
.jpg)
.jpg)
.jpg)
.jpg)
.jpg)
.jpg)
.jpg)
.jpg)
.jpg)
.jpg)
.jpg)
.jpg)
.jpg)
.jpg)
.jpg)
.jpg)
.jpg)
.jpg)
.jpg)
.jpg)
.jpg)
.jpg)
.jpg)
.jpg)
.jpg)
.jpg)
.jpg)
.jpg)
.jpg)
.jpg)
.jpg)
.jpg)
.jpg)
.jpg)
.jpg)
.jpg)
.jpg)
.jpg)
.jpg)
.jpg)
.jpg)
.jpg)
.jpg)
.jpg)
.jpg)
.jpg)
.jpg)
.jpg)
.jpg)
.jpg)
.jpg)
.jpg)
.jpg)
.jpg)
.jpg)
.jpg)
.jpg)
.jpg)
.jpg)
.jpg)
.jpg)
.jpg)
.jpg)
.jpg)
.jpg)
.jpg)
.jpg)
.jpg)
.jpg)
.jpg)
.jpg)
.jpg)
.jpg)
.jpg)
.jpg)
.jpg)
.jpg)
.jpg)
.jpg)
.jpg)
.jpg)
.jpg)
.jpg)
.jpg)
.jpg)
.jpg)
.jpg)
.jpg)
.jpg)
.jpg)
.jpg)
.jpg)
.jpg)
.jpg)
.jpg)
.jpg)
.jpg)
.jpg)
.jpg)
.jpg)
.jpg)
.jpg)
.jpg)
.jpg)
.jpg)
.jpg)
.jpg)
.jpg)
.jpg)
.jpg)
.jpg)
.jpg)
.jpg)
.jpg)
.jpg)
.jpg)
.jpg)