Let It Snow - Snowman card instructions
Let It Snow Suite Spotlight
The whimsical snowmen in this suite bring out the fun of the winter season! Just like each tiny snowflake is unique - you'll want to take a closer look at the unique features of this suite. It's easy to miss in the catalogue, but in real life you'll love the Let It Snow Specialty Designer Series Paper. One side has basic year-round patterns while the other has awesome glittery winter designs. Don't miss the Snowfall Accents Puff Paint and Let It Snow Embellishment Kit that make building frosty friends even more fun! So fun! Follow the step-by-step instructions on how to make a Snowman card.
Be happy, create and stamp a little ....

Let It Snow Suite Spotlight
| VIEW ONLINE |
Snowman Card
INSTRUCTIONS:- Cut Coastal Cabana cardstock to 5-1/2" x 8-1/2". Score at 4-1/4" along the 8-1/2" side.
- Cut a piece of the Coastal Cabana snowflake pattern of the Let It Snow Specialty Designer Series Paper to 5-1/2" x 4-1/4". Adhere to card front.
- Adhere 3-1/2" x 3-1/4" Real Read Glimmer Paper to centre of card front.
- Emboss 4-1/2" x 3" Whisper White cardstock with the Winter Knit 3D Embossing Folder.
- Use Paper Snips to fussy cut out three glittery snowmen from the Let It Snow Specialty Designer Series Paper. Using paper cut-outs is a great way to make the most of the detailed, colourful, and glittery snowmen in this paper. Adhere snowmen across top of embossed Whisper White cardstock with Stampin' Dimensionals.
- Wrap Whisper White Baker's Twine around cardstock, below the snowmen, twice and tie a bow between the left and centre snowmen.
- Adhere to card centred over glimmer paper with Multipurpose Liquid Glue or Stampin' Dimensionals.
- Rub Embossing Buddy over 3"x 3/4" Real Red cardstock. Stamp "Merry Christmas" greeting from the Snowman Season stamp set with VersaMark ink. Cover generously with White Stampin' Emboss Powder. Tap off excess. Heat emboss with the Heat Tool.
- Adhere greeting over Baker's Twine at bottom right of card with Stampin' Dimensionals.
- Use Multipurpose Liquid Glue to adhere little felt snowballs from the Let It Snow Embellishment Kit to the card. Place three above the right snowman like he's juggling them and a couple at the top right corner of the greeting tag.
SUPPLIES:
STAMPS: Snowman Season (#150458)
CARDSTOCK: Coastal Cabana (#131297), Real Red (#102482), Whisper White (#100730), Real Red Glimmer Paper (#150427)
PAPER: Let It Snow Specialty Designer Series Paper (#150393)
INK: VersaMark (#102283)
ACCESSORIES: Whisper White Solid Baker's Twine (#124262), Let It Snow Embellishment Kit (#150425)
ADHESIVES: SNAIL (#104331), Stampin' Dimensionals (#104430), Multipurpose Liquid Glue (#110755)
TOOLS: Winter Knit 3D Embossing Folder (#150645), Heat Tool (#129053), Embossing Buddy (#103083), White Stampin' Emboss Powder (#109132), and Paper Snips (#103579)
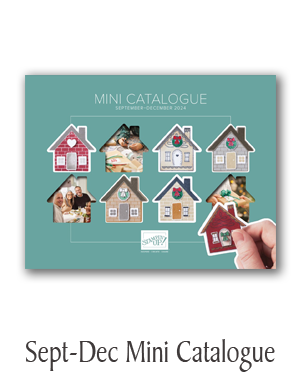
| DOWNLOAD THE CATALOGUE |
TAKE ME BACK TO THE TOP


 Each month a fully designed project kit arrives in a delightful box filled with stamps, ink, and paper—everything cut and ready to go so you can skip to the fun. Just think of it as creativity in a box.

.jpg)
.jpg)
.jpg)
.jpg)
.jpg)
.jpg)
.jpg)
.jpg)
.jpg)
.jpg)
.jpg)
.jpg)
.jpg)
.jpg)
.jpg)
.jpg)
.jpg)
.jpg)
.jpg)
.jpg)
.jpg)
.jpg)
.jpg)
.jpg)
.jpg)
.jpg)
.jpg)
.jpg)
.jpg)
.jpg)
.jpg)
.jpg)
.jpg)
.jpg)
.jpg)
.jpg)
.jpg)
.jpg)
.jpg)
.jpg)
.jpg)
.jpg)
.jpg)
.jpg)
.jpg)
.jpg)
.jpg)
.jpg)
.jpg)
.jpg)
.jpg)
.jpg)
.jpg)
.jpg)
.jpg)
.jpg)
.jpg)
.jpg)
.jpg)
.jpg)
.jpg)
.jpg)
.jpg)
.jpg)
.jpg)
.jpg)
.jpg)
.jpg)
.jpg)
.jpg)
.jpg)
.jpg)
.jpg)
.jpg)
.jpg)
.jpg)
.jpg)
.jpg)
.jpg)
.jpg)
.jpg)
.jpg)
.jpg)
.jpg)
.jpg)
.jpg)
.jpg)
.jpg)
.jpg)
.jpg)
.jpg)
.jpg)
.jpg)
.jpg)
.jpg)
.jpg)
.jpg)
.jpg)
.jpg)
.jpg)
.jpg)
.jpg)
.jpg)
.jpg)
.jpg)
.jpg)
.jpg)
.jpg)
.jpg)
.jpg)
.jpg)
.jpg)
.jpg)
.jpg)
.jpg)
.jpg)
.jpg)
.jpg)
.jpg)
.jpg)
.jpg)
.jpg)
.jpg)
.jpg)
.jpg)
.jpg)
.jpg)
.jpg)
.jpg)
.jpg)
.jpg)
.jpg)
.jpg)
.jpg)
.jpg)
.jpg)
.jpg)
.jpg)
.jpg)
.jpg)
.jpg)
.jpg)
.jpg)
.jpg)
.jpg)
.jpg)
.jpg)
.jpg)
.jpg)
.jpg)
.jpg)
.jpg)
.jpg)
.jpg)
.jpg)
.jpg)
.jpg)
.jpg)
.jpg)
.jpg)
.jpg)
.jpg)
.jpg)
.jpg)
.jpg)
.jpg)
.jpg)
.jpg)
.jpg)
.jpg)
.jpg)
.jpg)
.jpg)
.jpg)
.jpg)
.jpg)
.jpg)
.jpg)
.jpg)
.jpg)
.jpg)
.jpg)
.jpg)
.jpg)
.jpg)
.jpg)
.jpg)
.jpg)
.jpg)
.jpg)
.jpg)
.jpg)
.jpg)
.jpg)
.jpg)
.jpg)
.jpg)
.jpg)
.jpg)
.jpg)
.jpg)
.jpg)
.jpg)
.jpg)
.jpg)
.jpg)
.jpg)